Fun Projects for your LEGO® MINDSTORMS® NXT!
|
|
Fun Projects for your LEGO® MINDSTORMS® NXT! |
| Multi-Bot Vehicle |
|
![]()
1
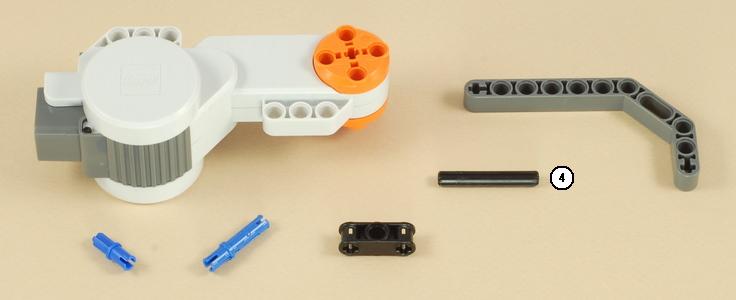
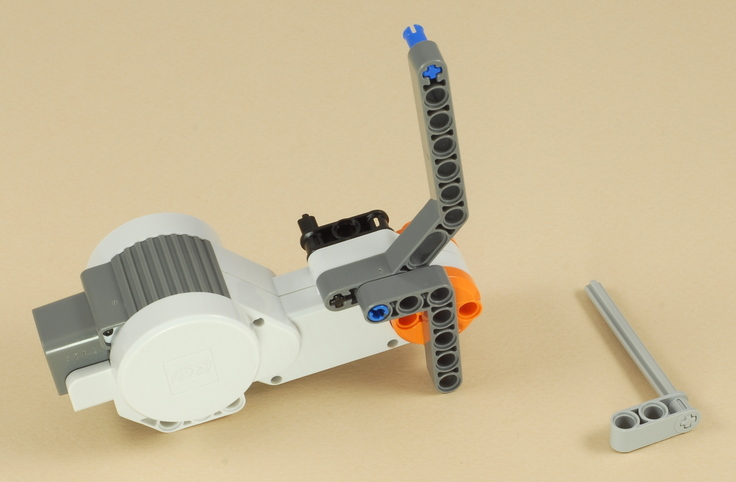
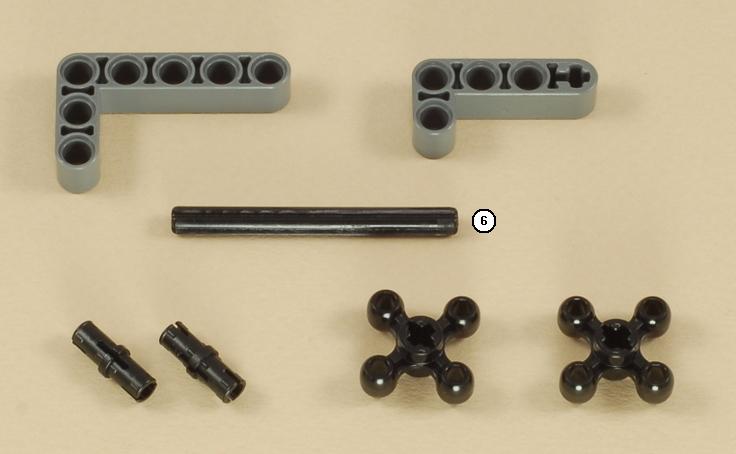
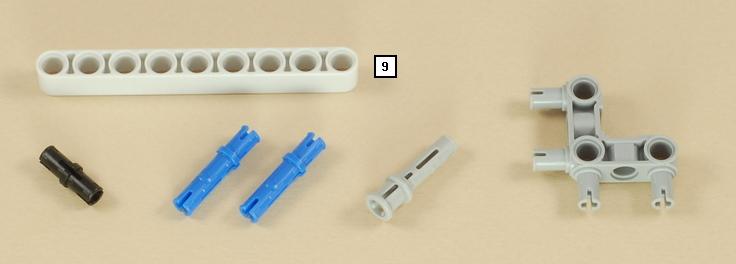
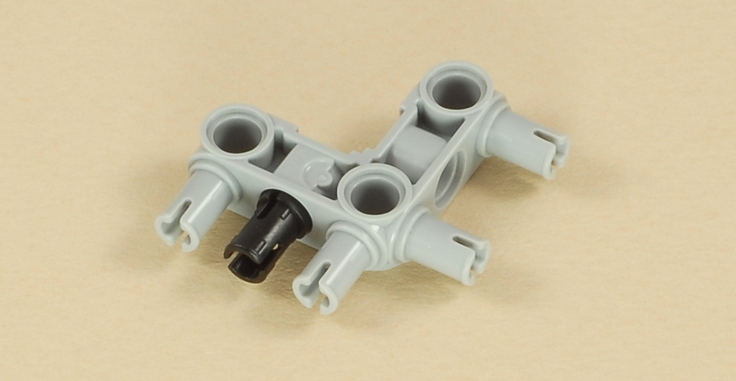
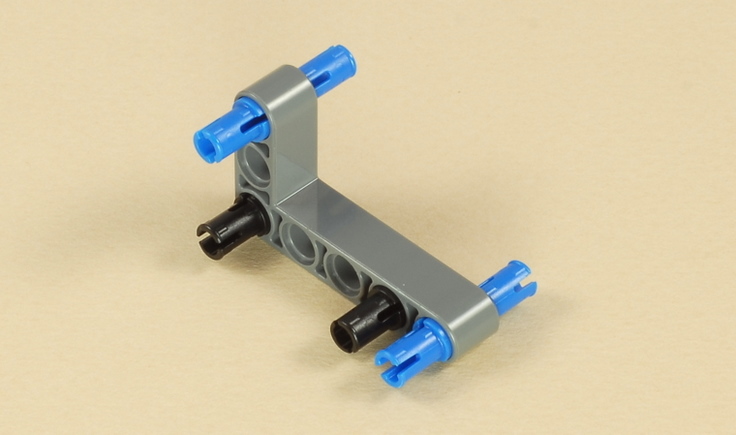
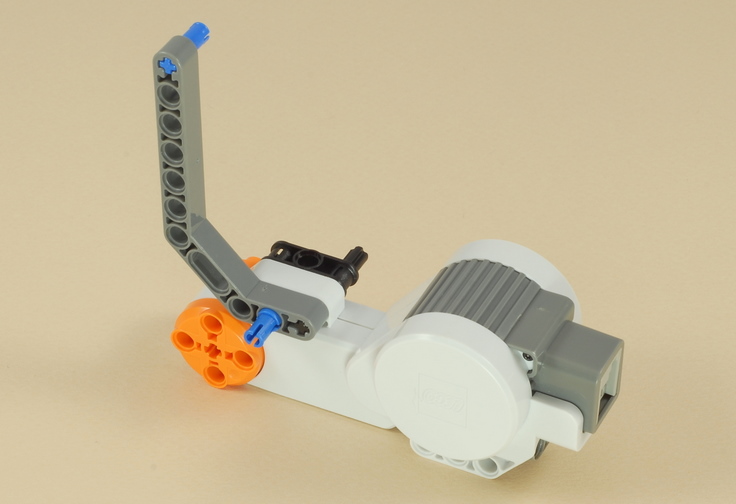
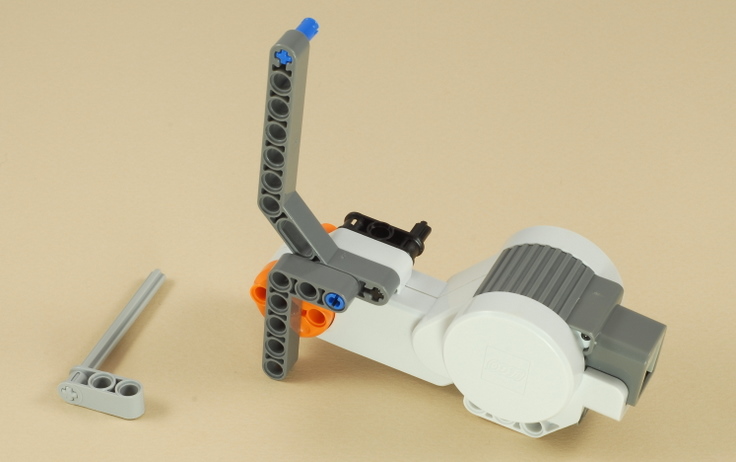
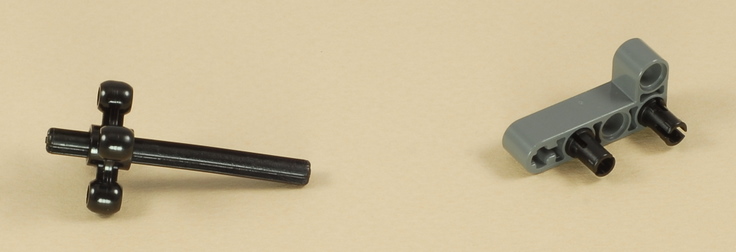
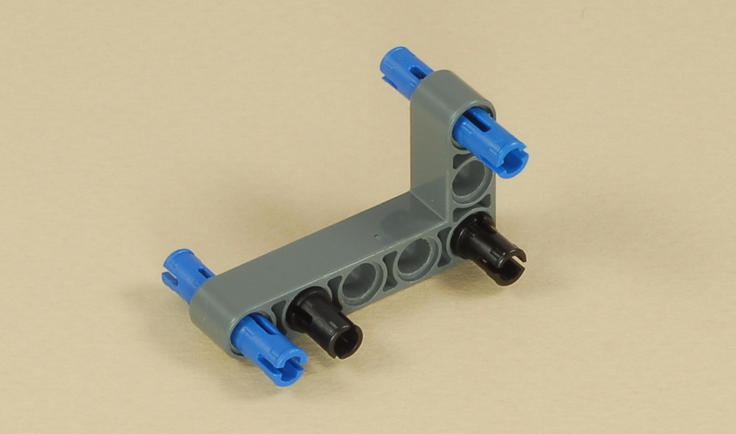
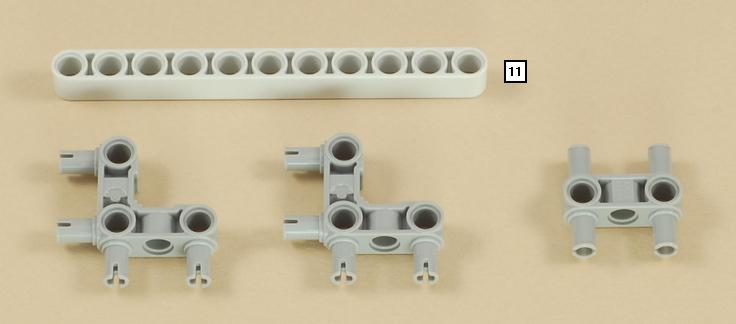
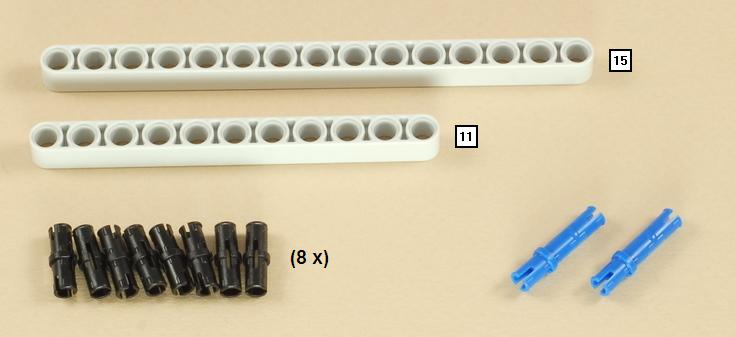
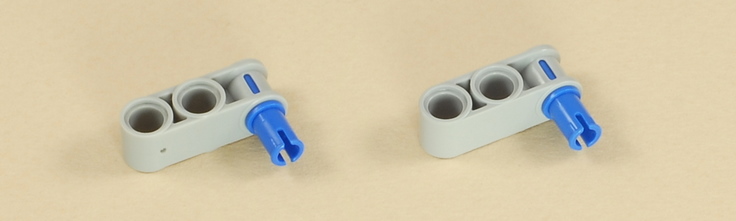
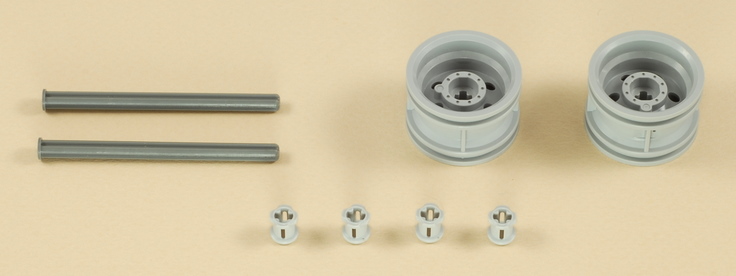
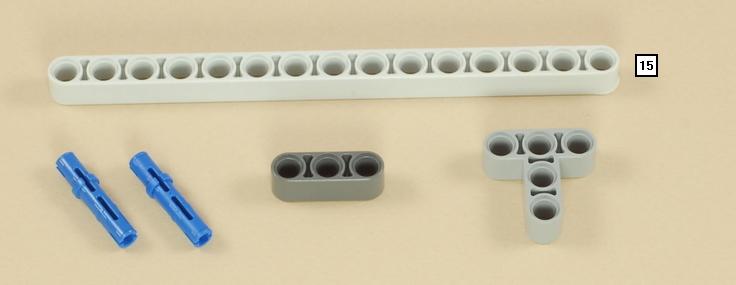
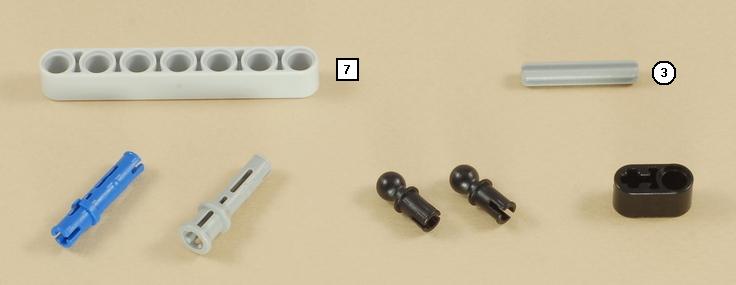
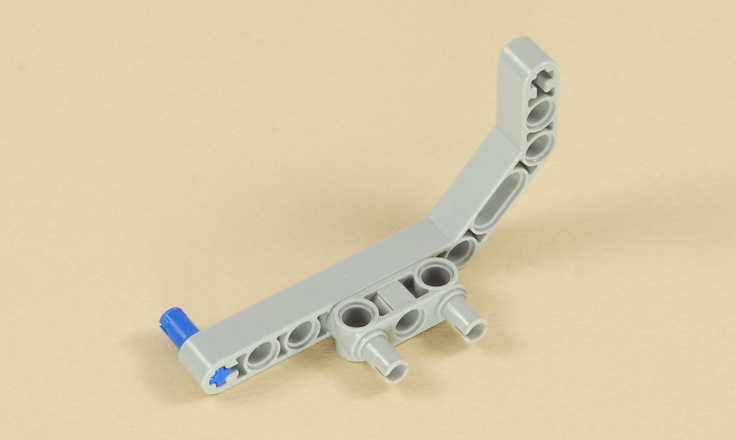
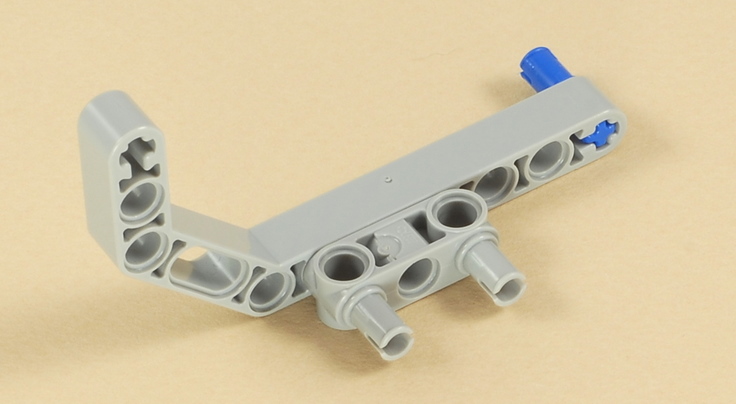
| Note: A number specified next to a beam or an axle, such as the "4" next to the axle above, refers to the length of the part in "modules", or holes. Make sure you choose parts of the correct lengths. To measure a beam, you can simply count its number of holes. To measure an axle, you can hold it up next to a beam and count its length in holes. |
2
3
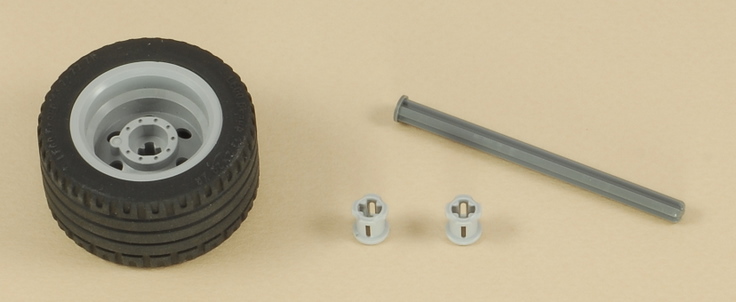
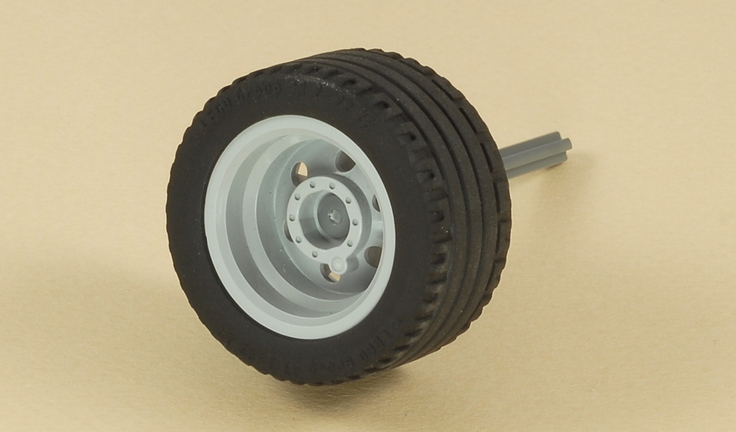
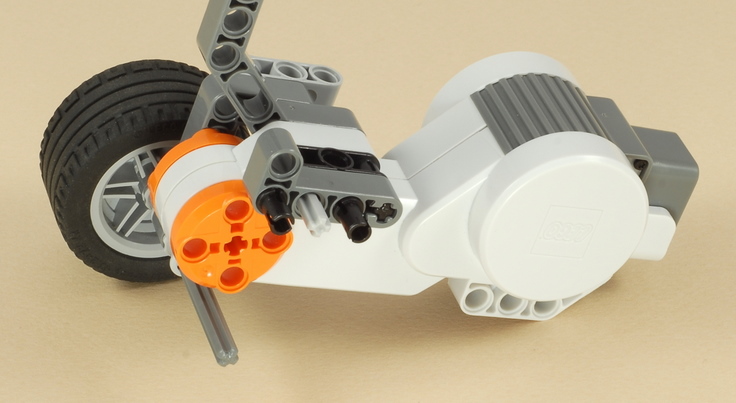
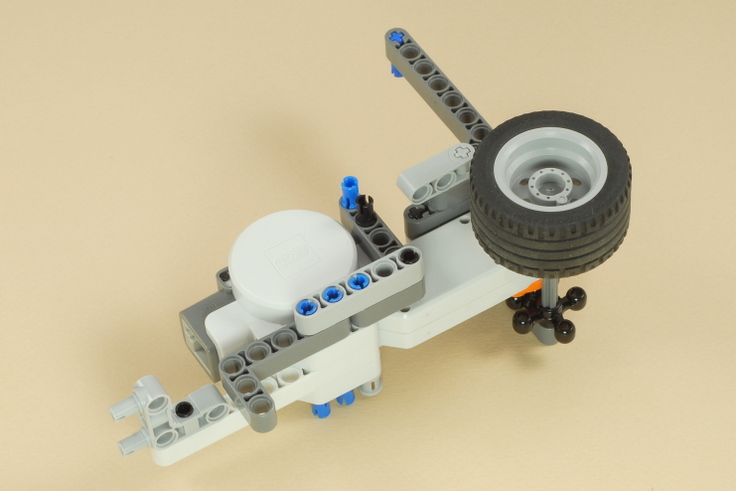
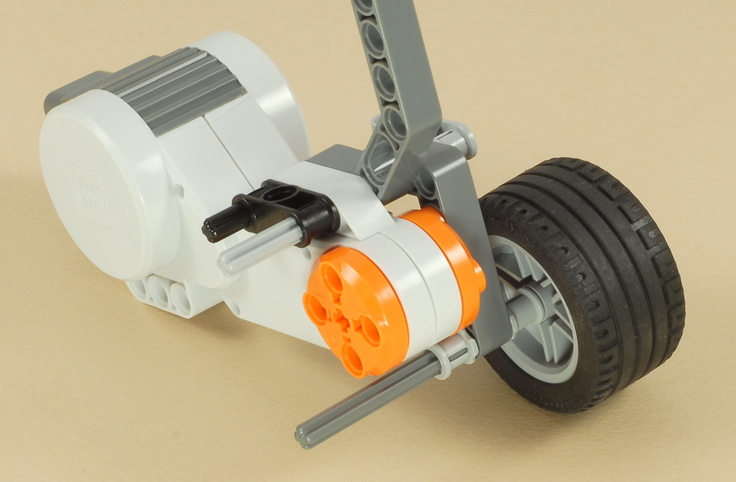
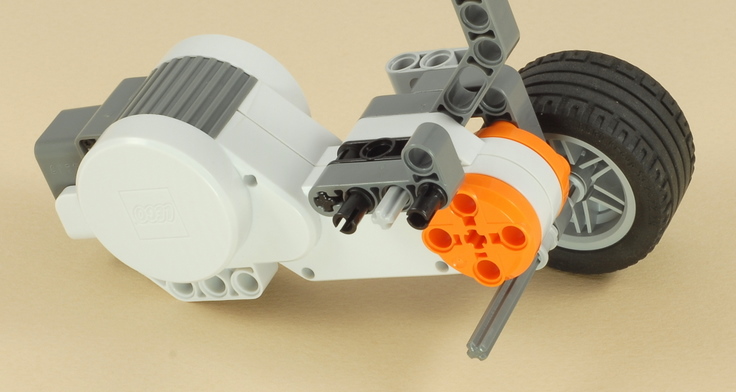
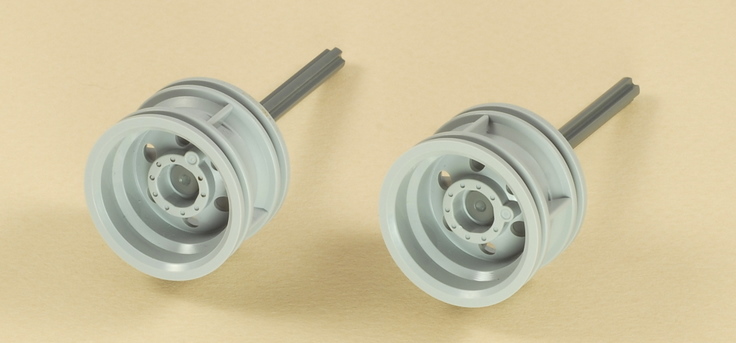
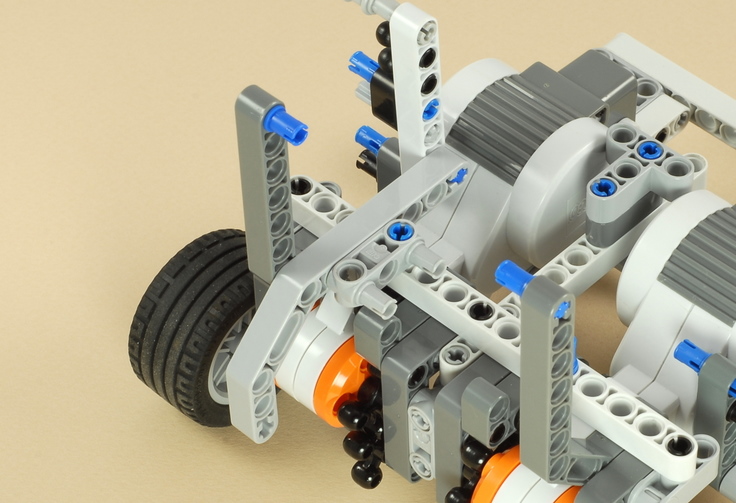
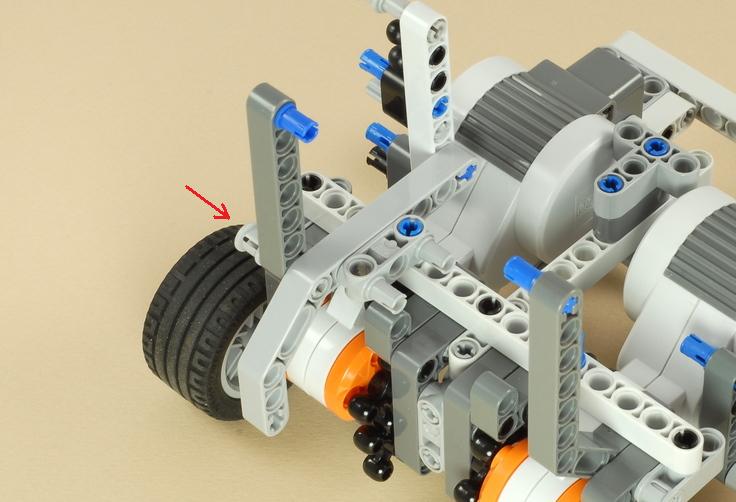
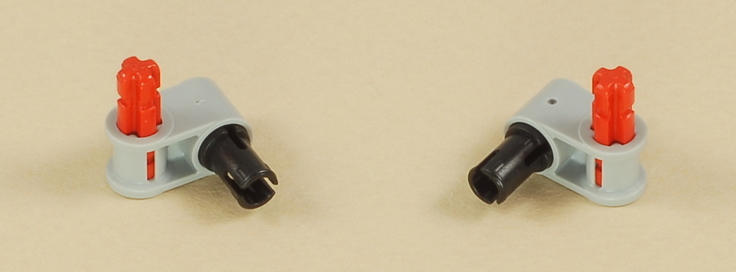
| Important: Make sure the wheel is oriented correctly, with the "spokes" on the inside. |
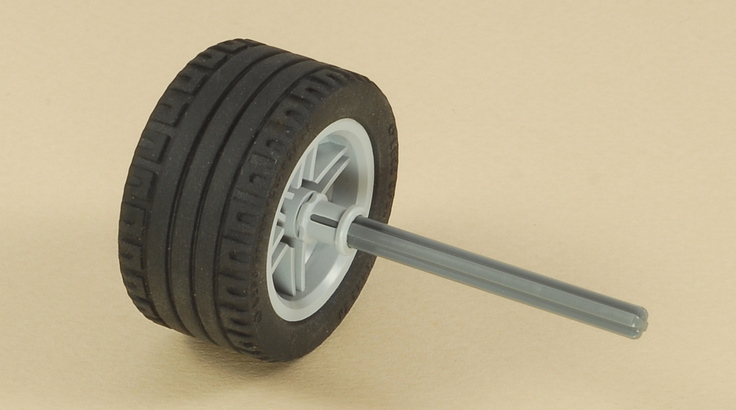
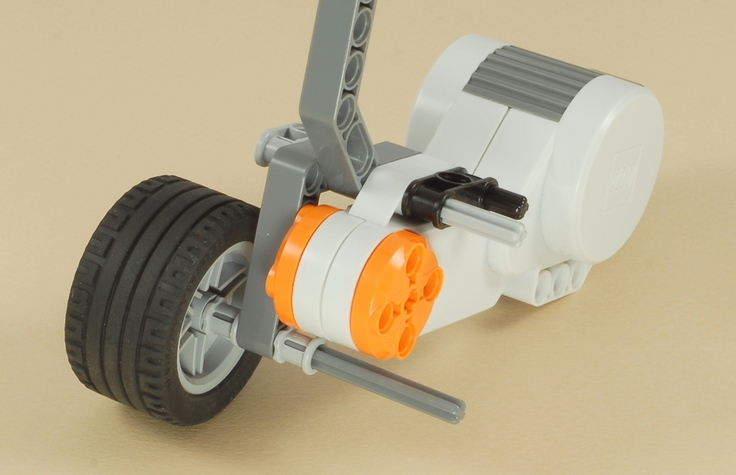
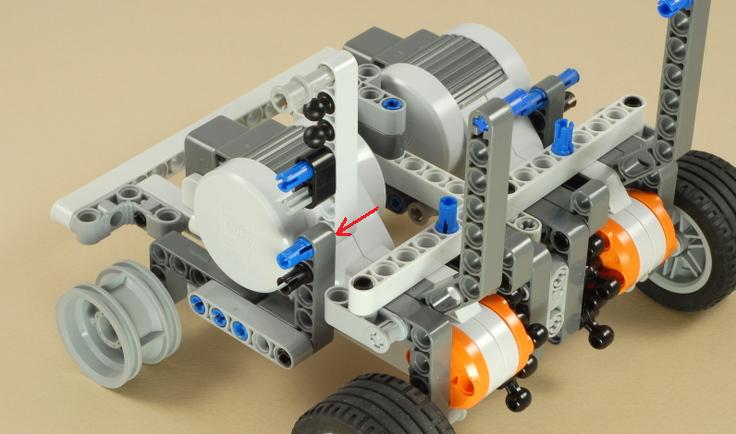
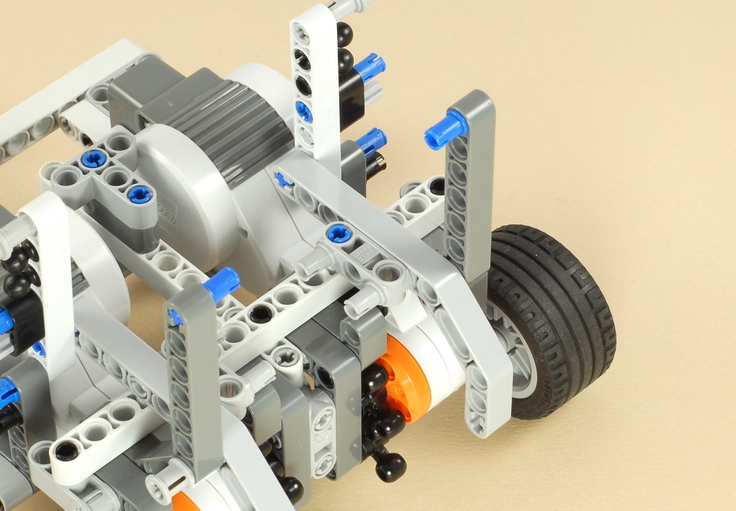
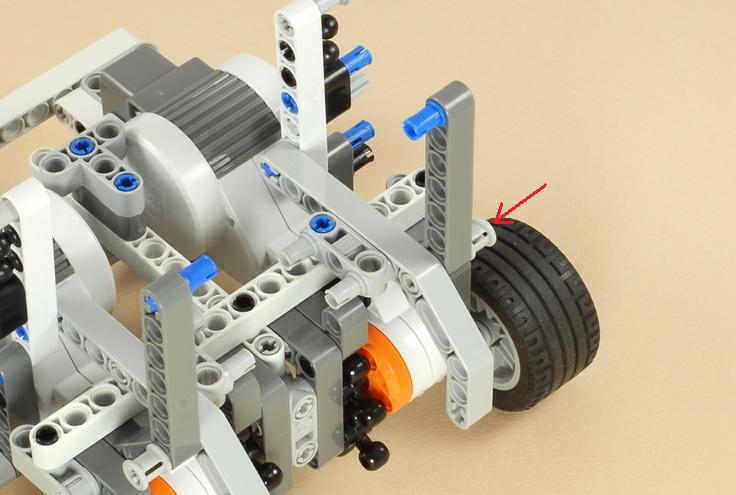
| Slide the axle through the right-angled beam on the motor assembly as shown below, then push on the second bushing. Make sure that the bushing is not too tight, so that the axle still turns freely. Finally, check to make sure that the axle stop is still pulled all the way into the hub of the wheel. |
4
5
6
7
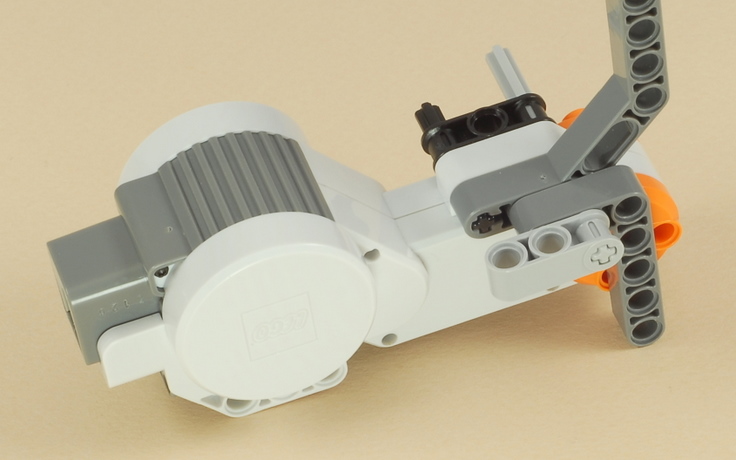
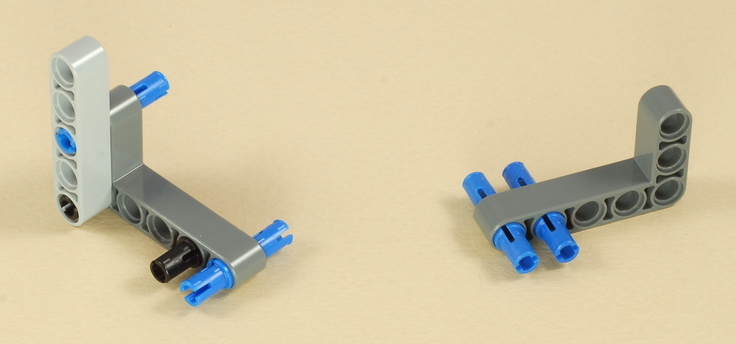
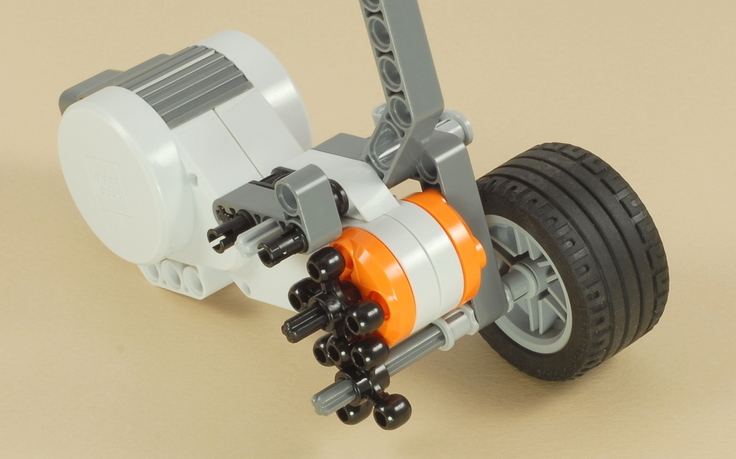
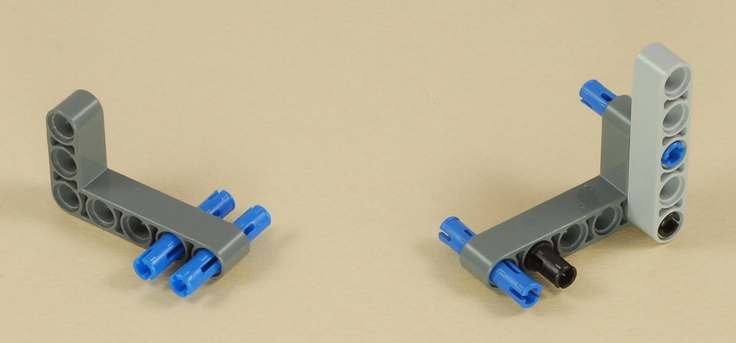
| The Right Side assembly is an exact mirror image of the Left Side assembly. |

8
9
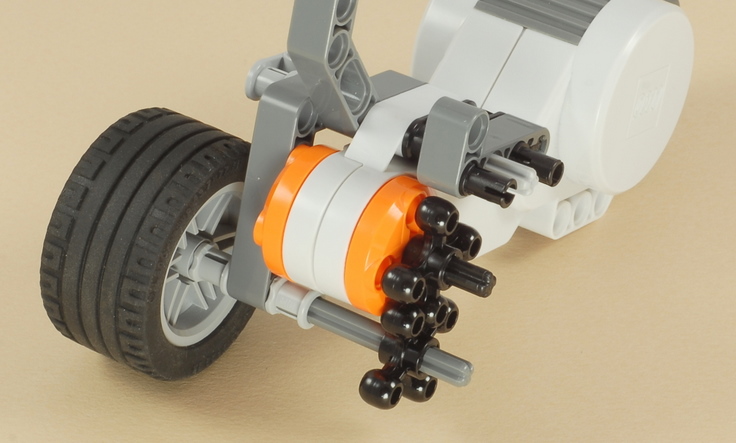
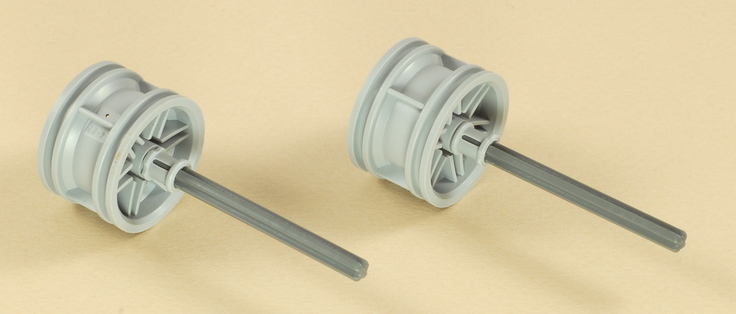
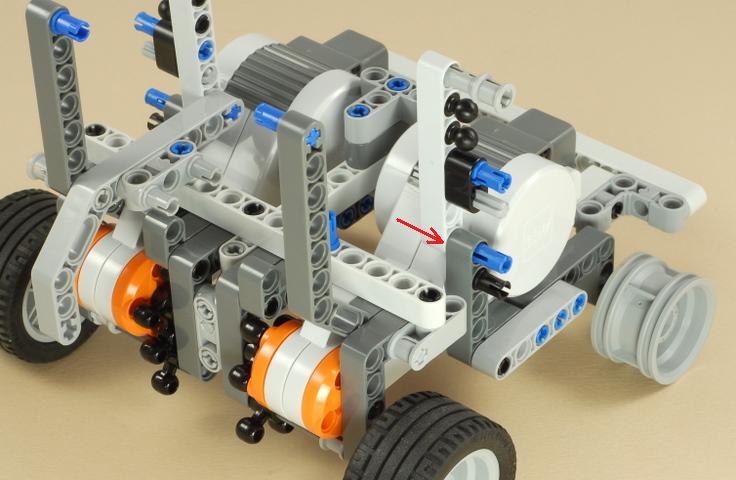
| Important: Make sure the wheel is oriented correctly, with the "spokes" on the inside. |
| Slide the axle through the right-angled beam on the motor assembly as shown below, then push on the second bushing. Make sure that the bushing is not too tight, so that the axle still turns freely. Finally, check to make sure that the axle stop is still pulled all the way into the hub of the wheel. |
10

11
12
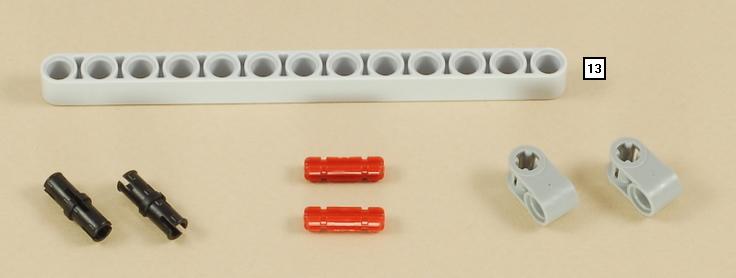
13
14
15

16
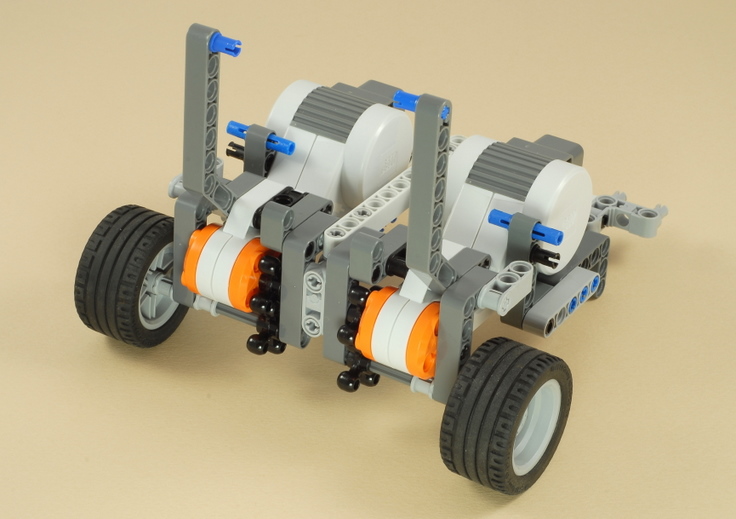
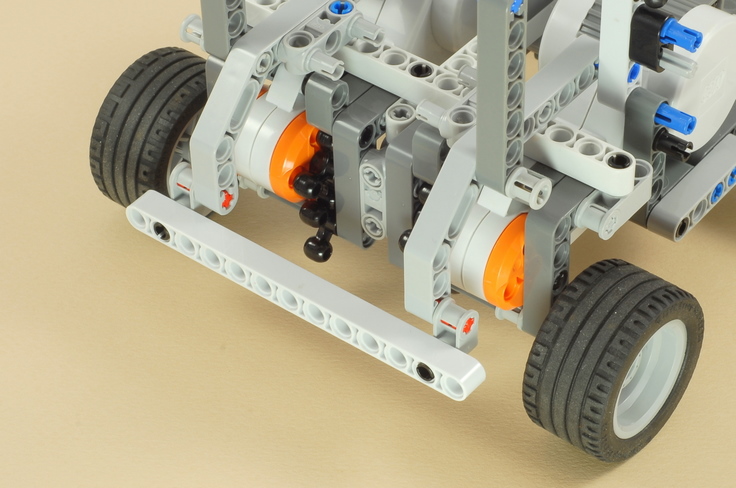
| Important: Make sure the wheels are oriented correctly, with the "spokes" on the inside. |
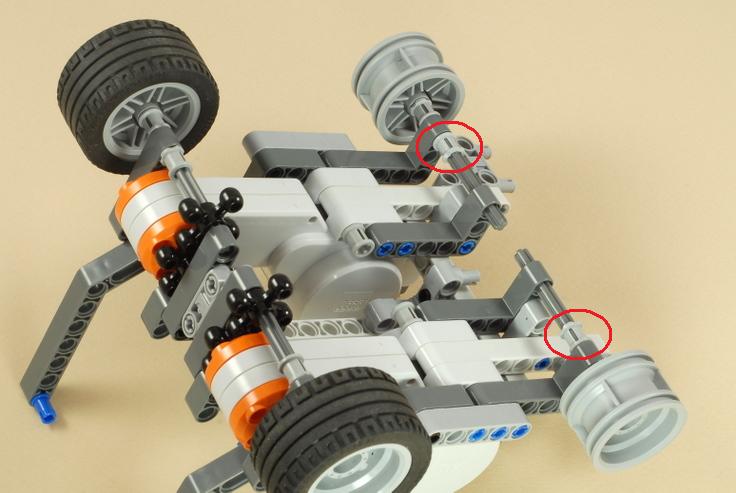
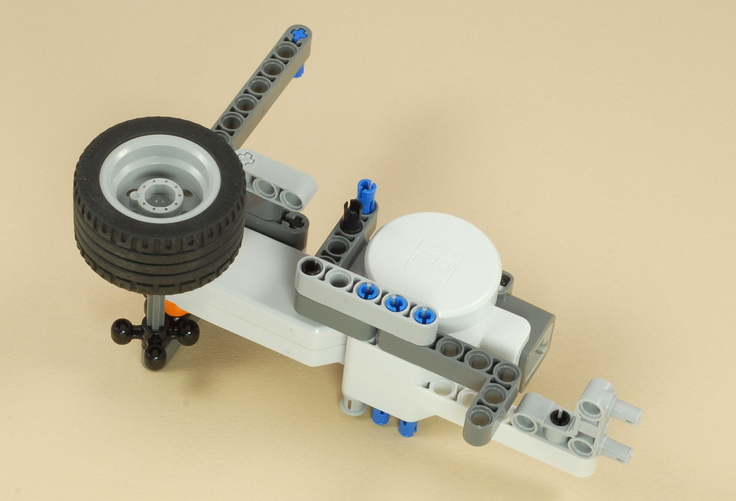
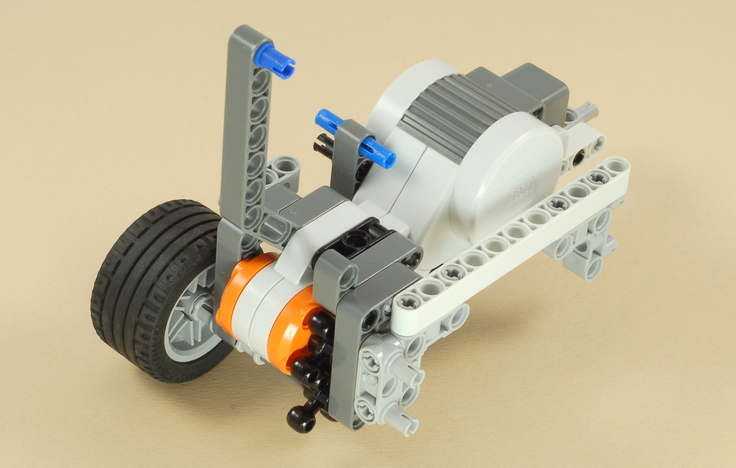
| Note that the front wheels on Multi-Bot do not have
the rubber tires installed. This allows the robot to turn easily
on smooth surfaces by sliding the front wheels from side to side.
Only the rear wheels, which are driven by the motors, need the traction
provided by the rubber tires.
|
17
18

19
20
21
22
23

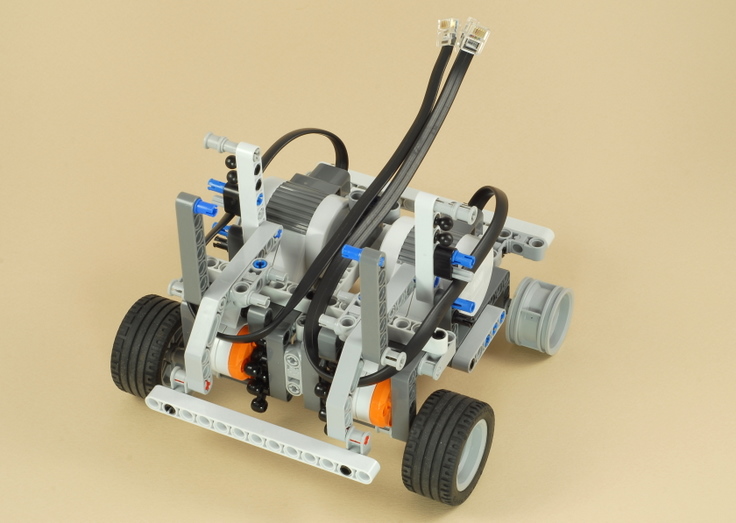
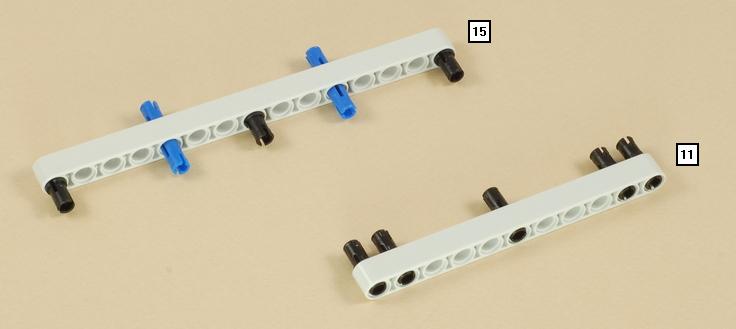
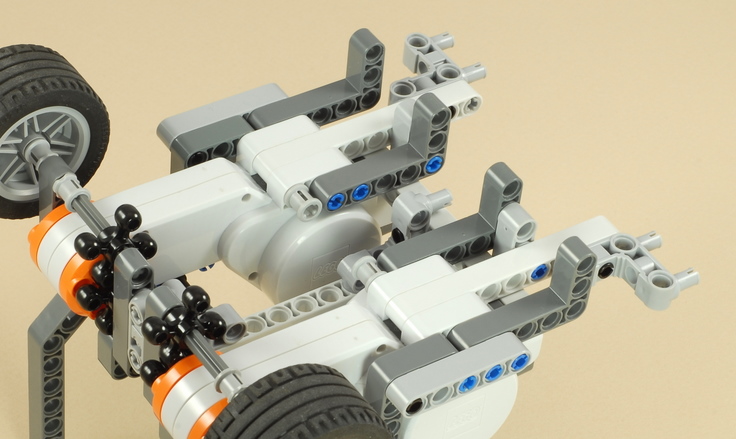
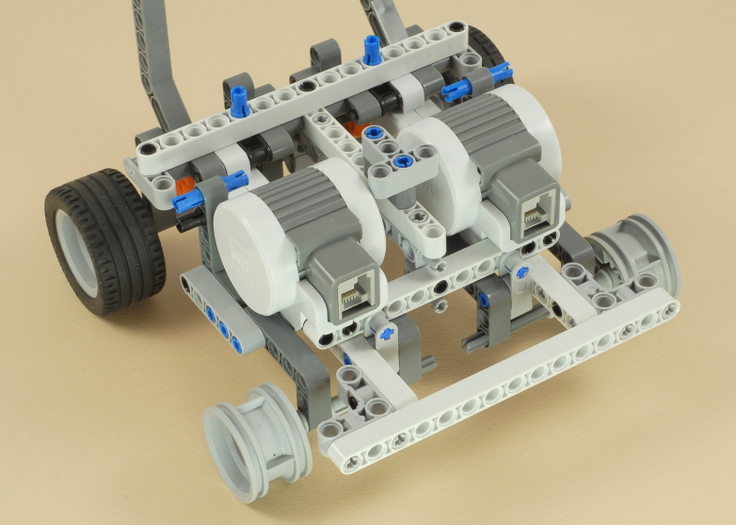
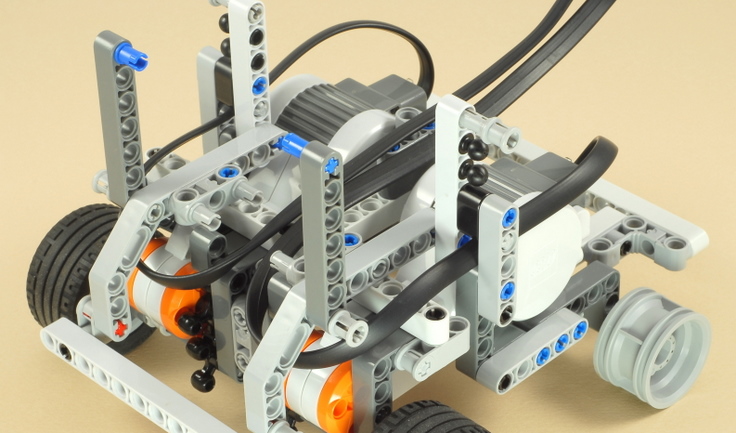
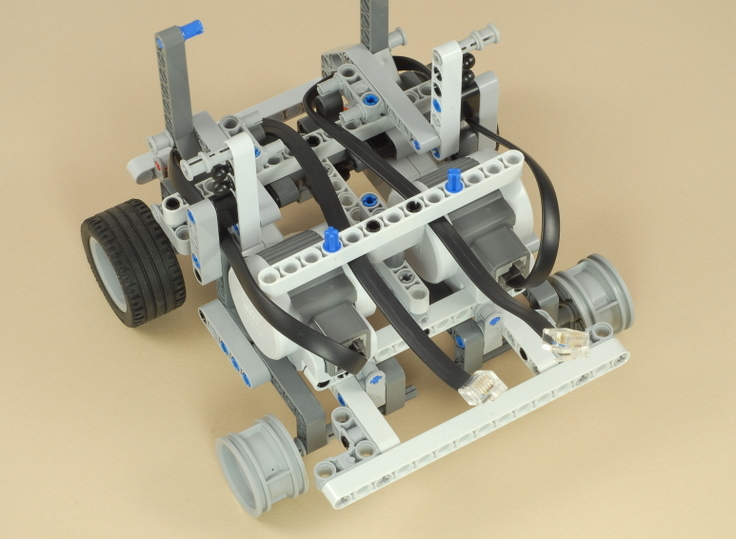
| Route the two wires from the motors around the back of the vehicle as shown above, then use the two 5M beams to trap the wires in place on the two side uprights as shown below. |
24
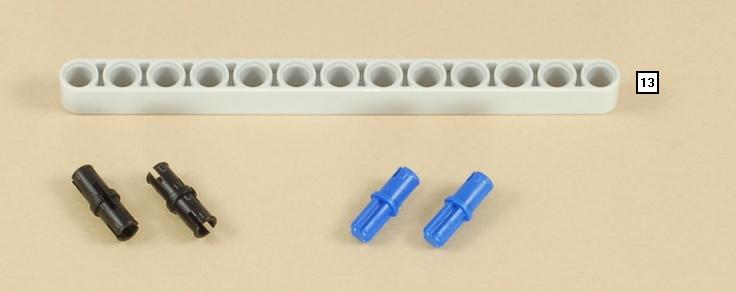
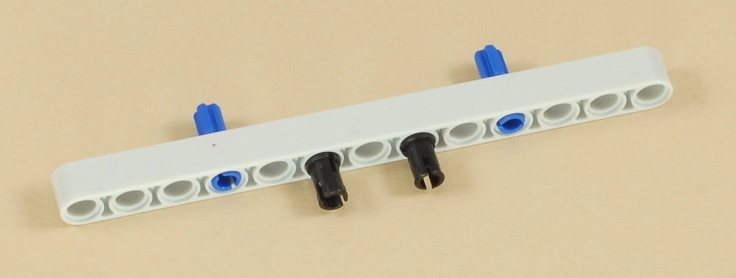
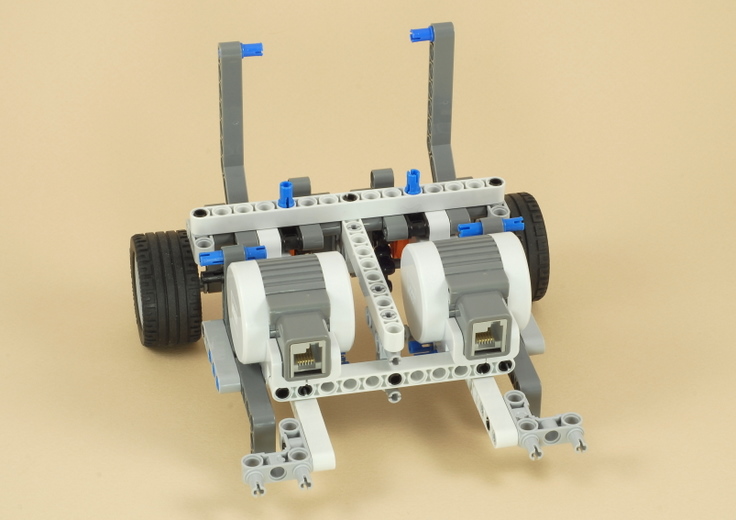
| The two wires will fit under the 13-beam added here, as shown below. Twist the wires as necessary so that they lay flat between the 13-beam and the motors. |
25
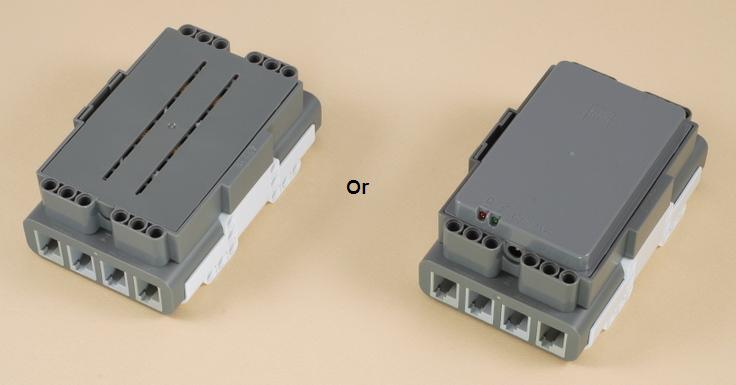
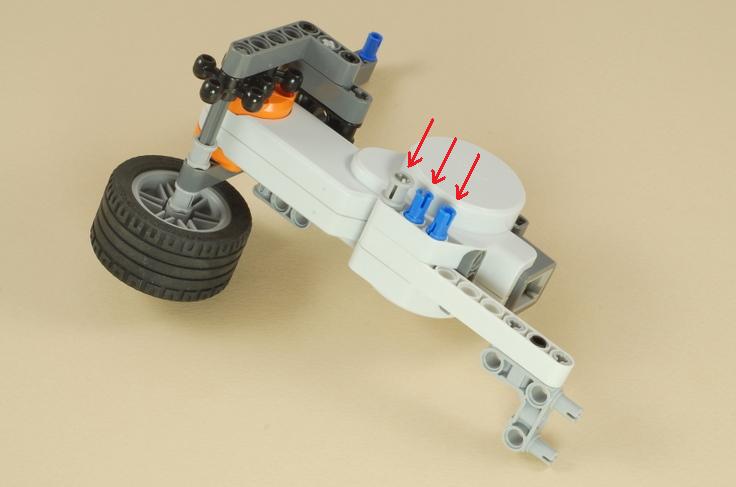
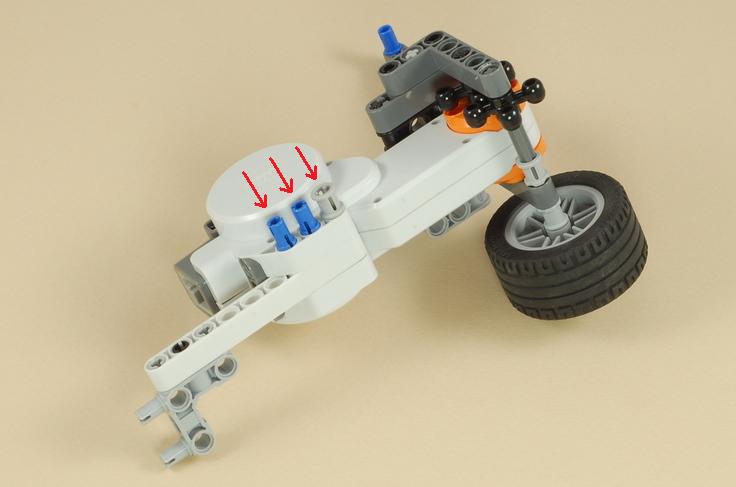
| Multi-Bot will fit the NXT brick with either AA batteries or the NXT Rechargeable Battery Pack. |
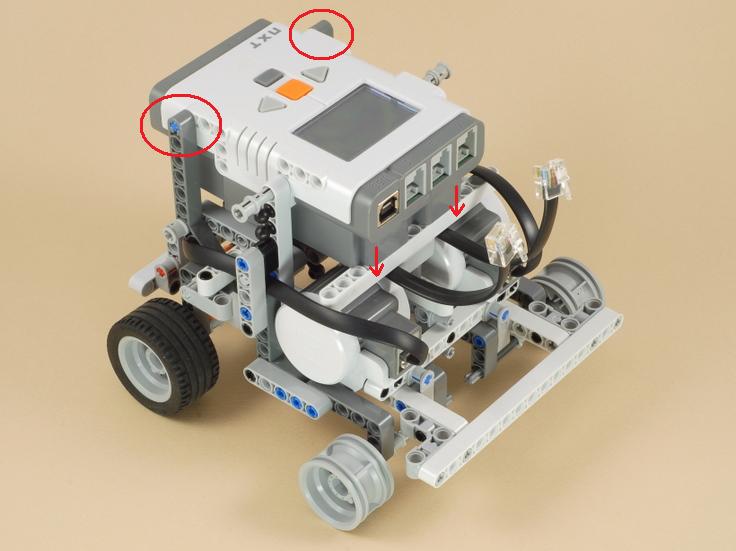
| After pushing the NXT brick down onto the blue pegs in the front as shown above, push the two gray bushed pegs in from the sides to lock the NXT in, then connect the two wires to ports B and C as shown below. |
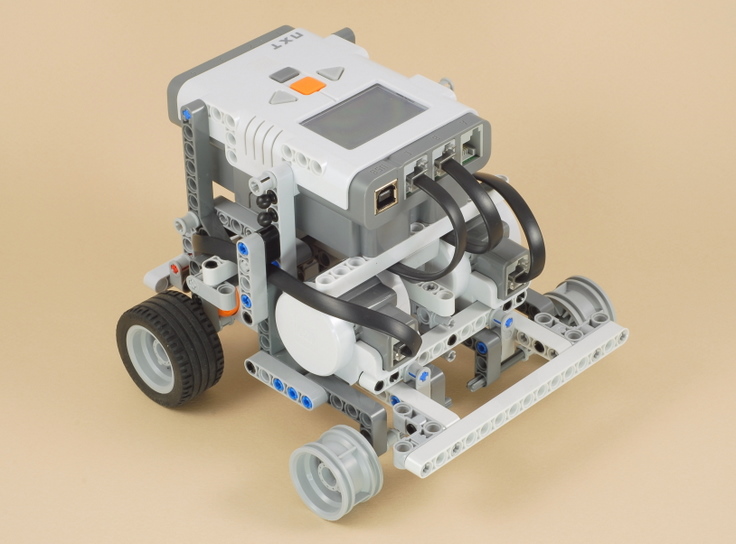
| This completes the Multi-Bot vehicle base with wheels and a "medium" gear ratio. To change to treads or a different gear ratio, and to learn how to easily change AA batteries, see the Vehicle Variations. |
|
Copyright
©
2007-2011 by Dave Parker. All rights reserved. |