Fun Projects for your LEGO® MINDSTORMS® NXT!
|
|
Fun Projects for your LEGO® MINDSTORMS® NXT! |
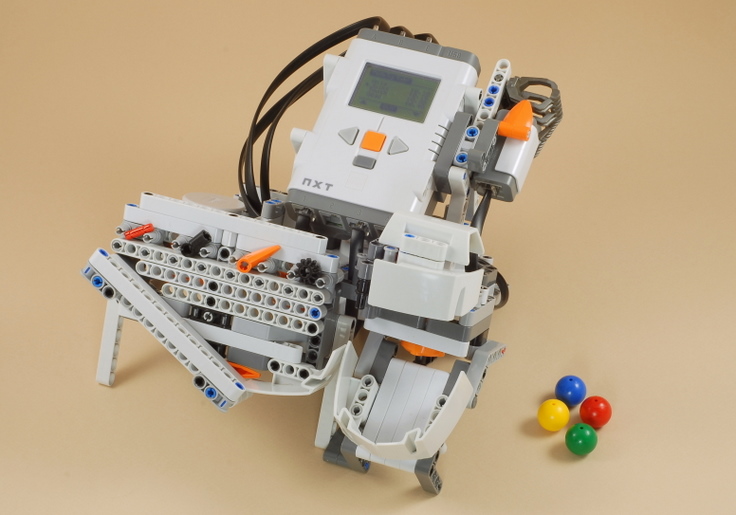
| Vending Machine |
|
![]()
1

2
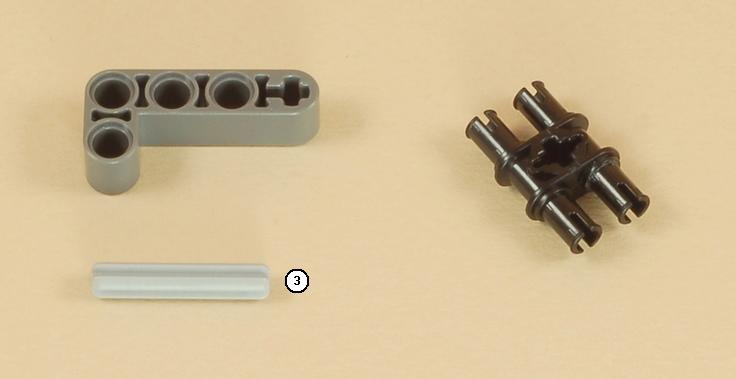
3
4

5
6
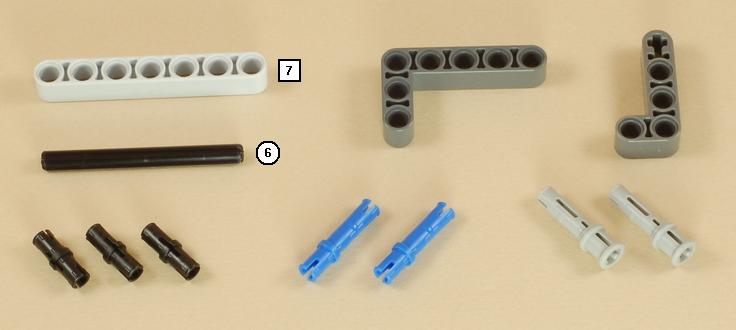
7
8
9
10
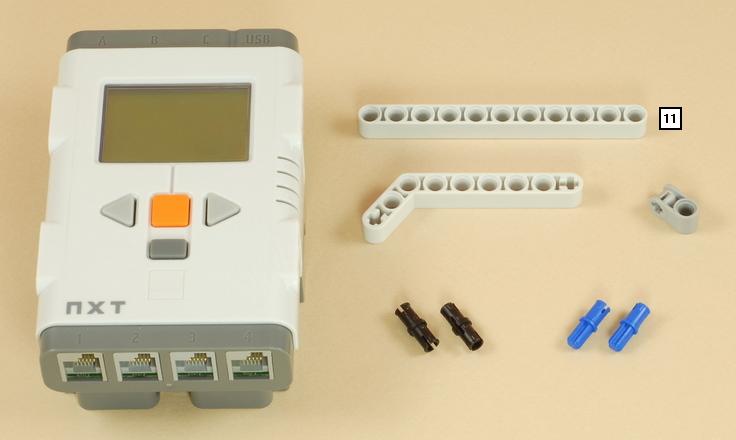
11
12
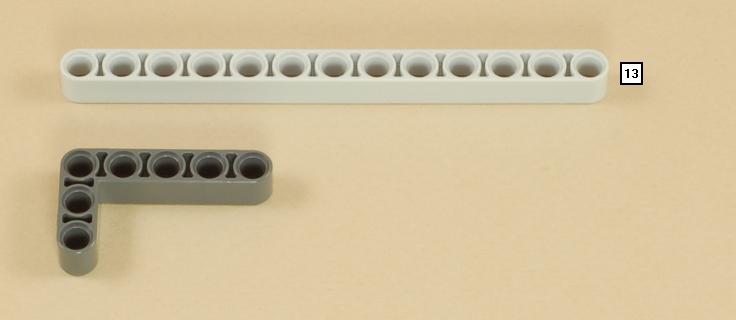
13

14
15
16
17
18

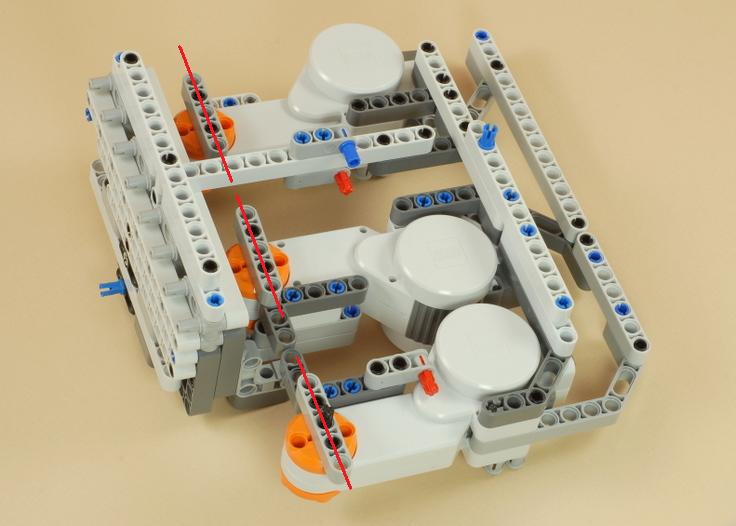
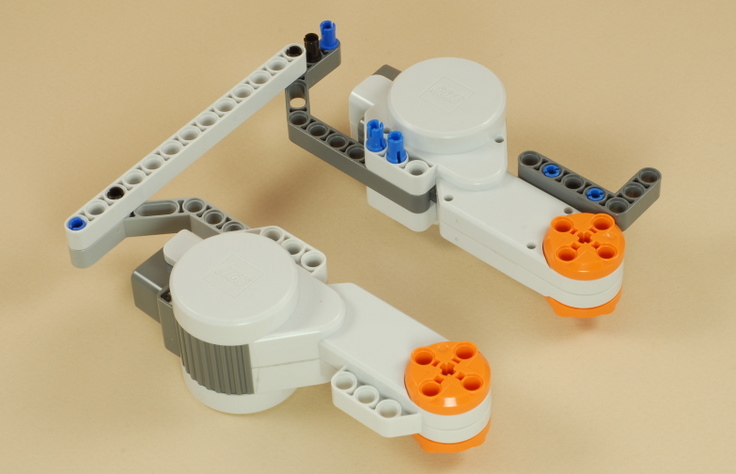
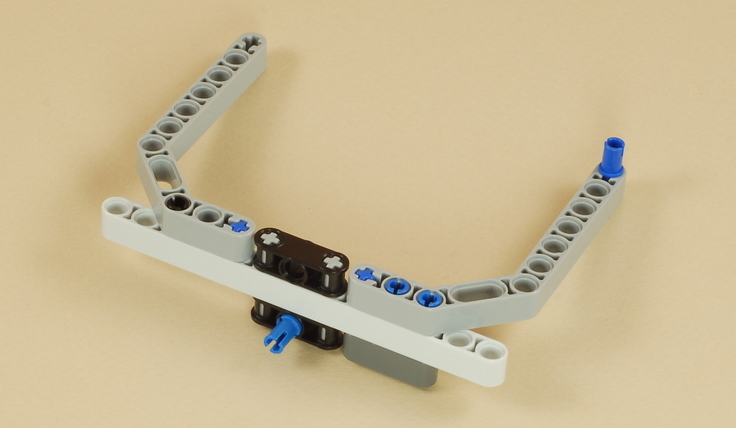
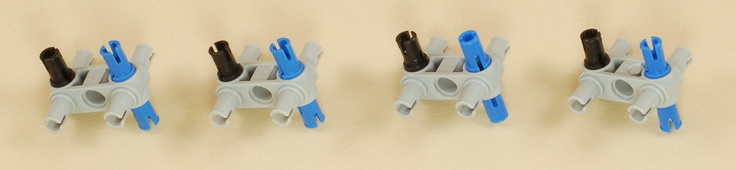
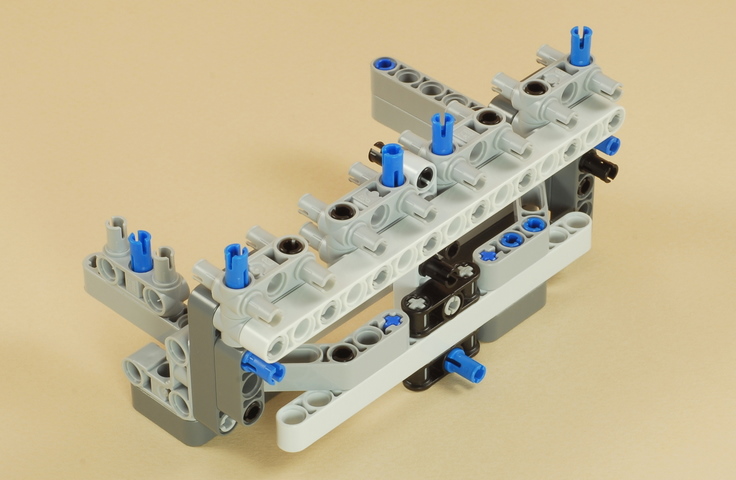
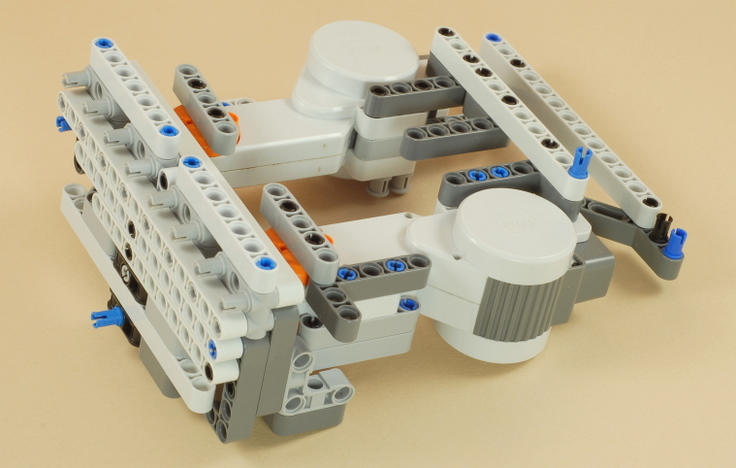
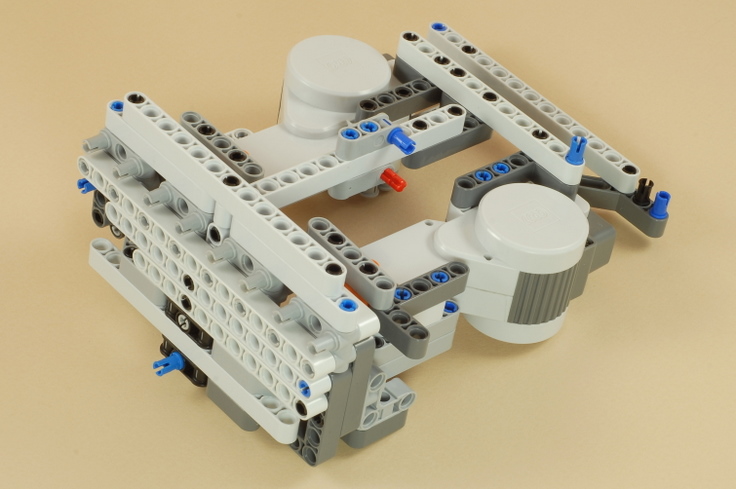
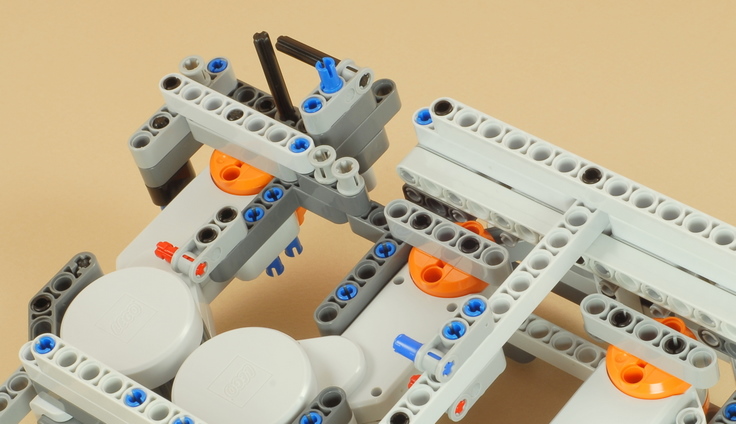
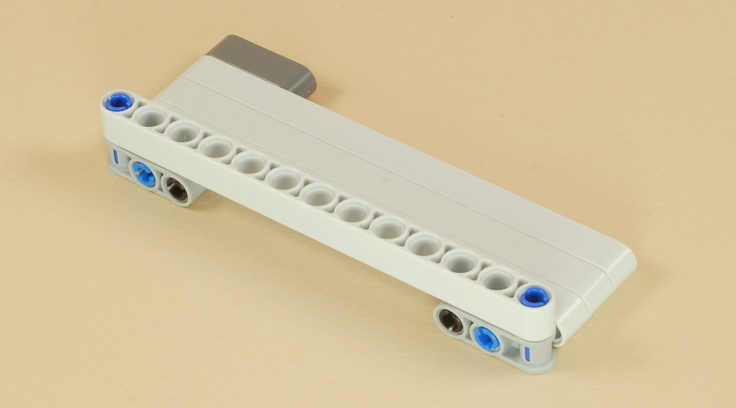
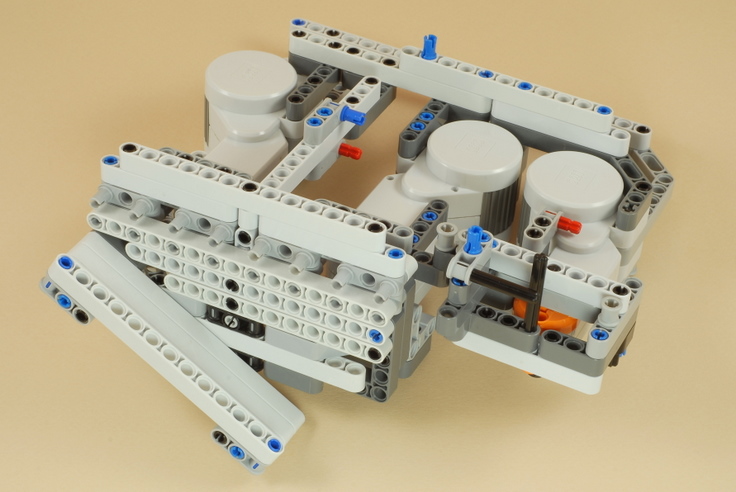
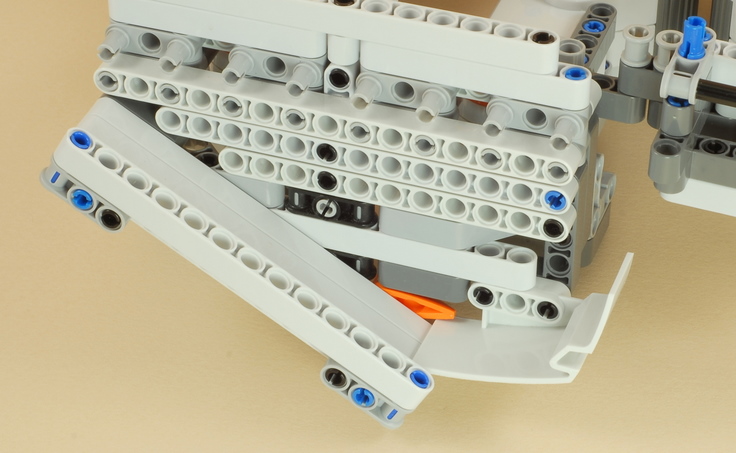
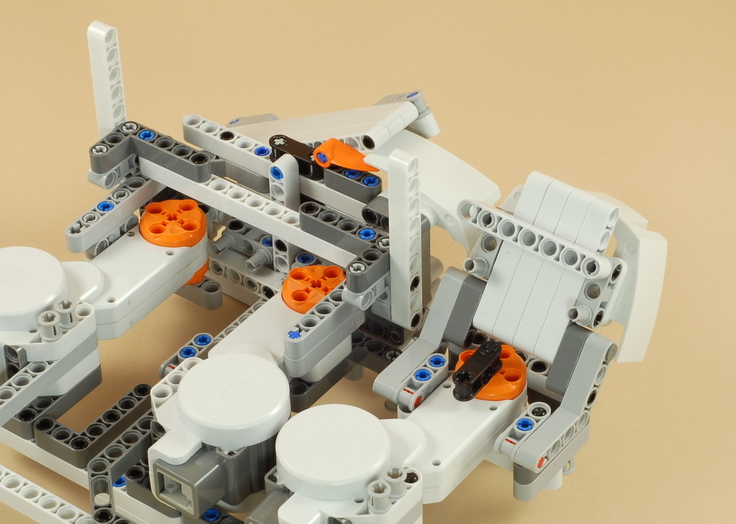
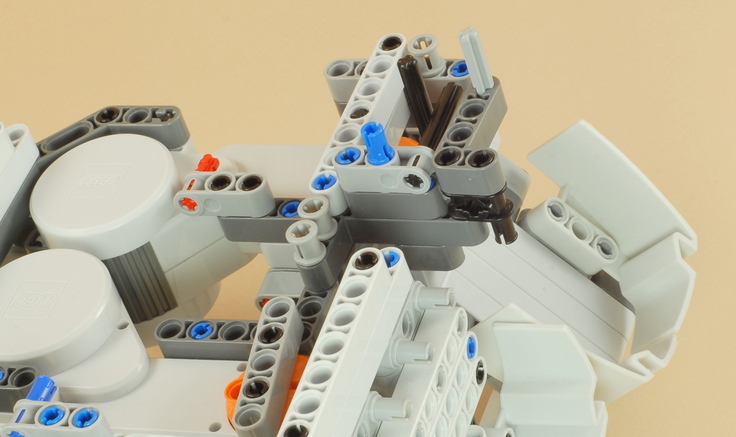
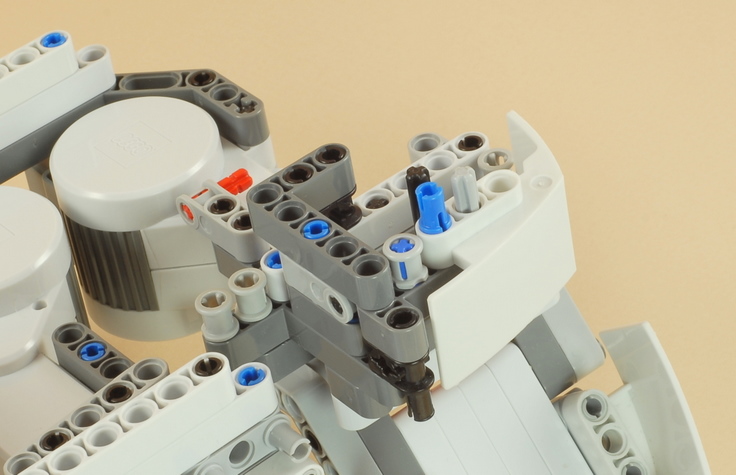
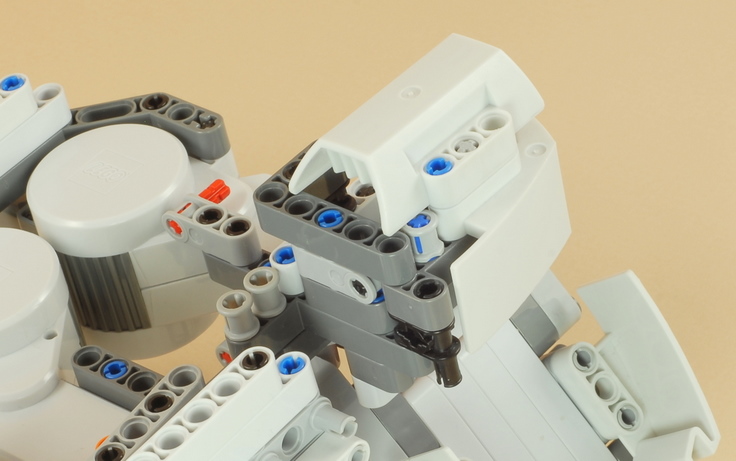
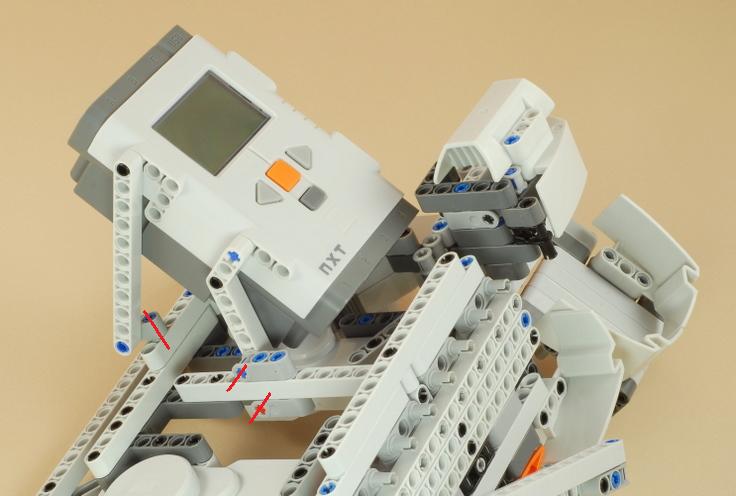
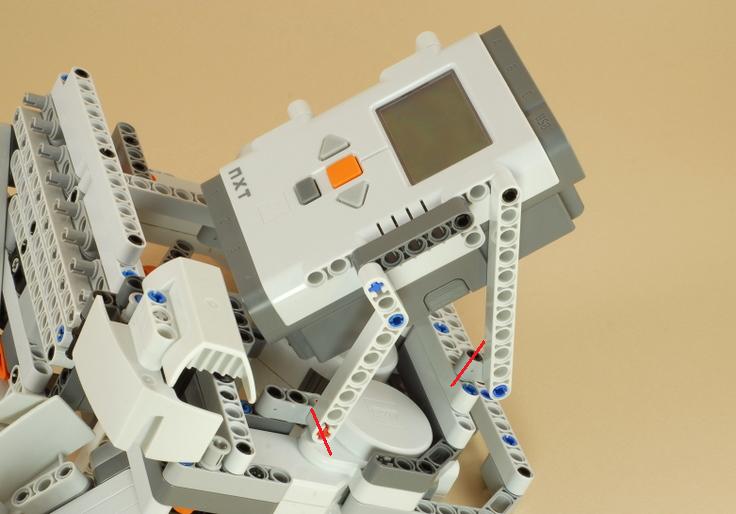
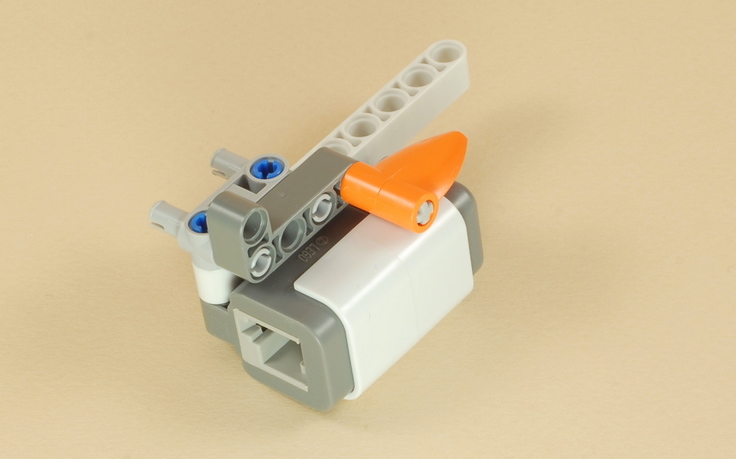
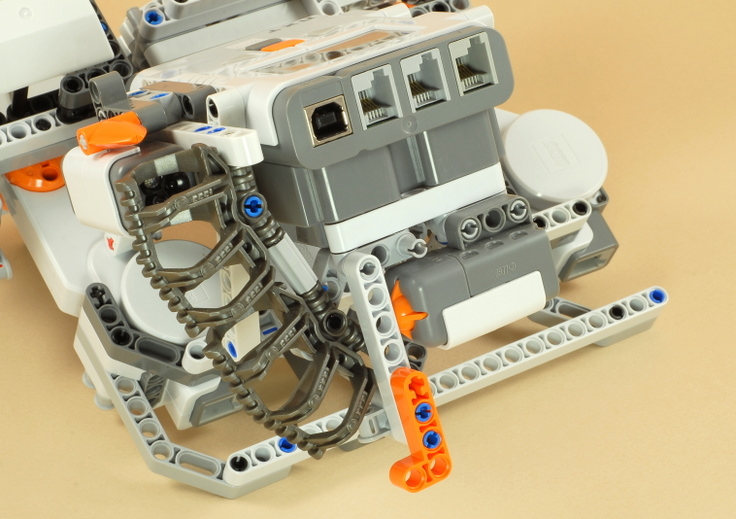
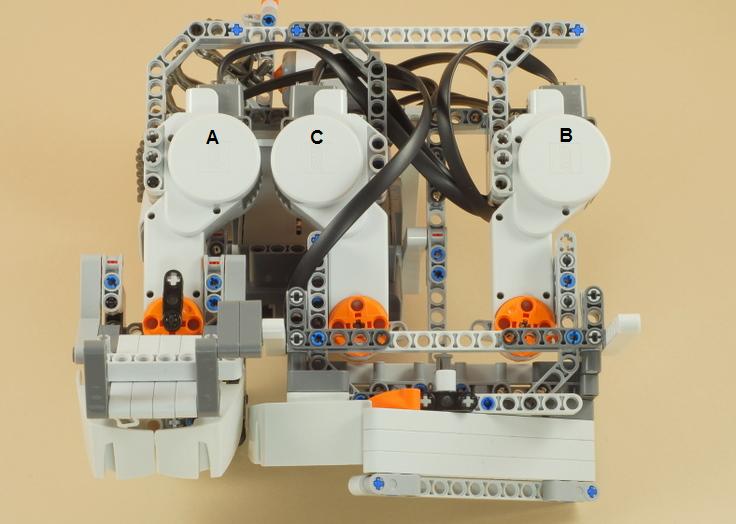
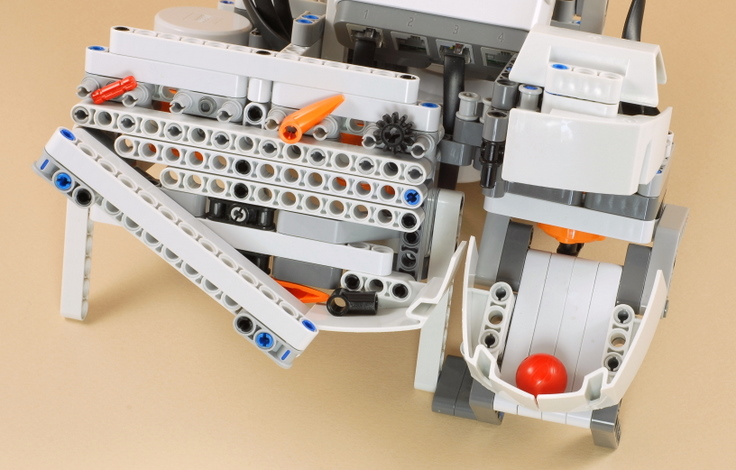
| Make sure the three gray 5-beams on the motors are parallel to the front of the machine as shown above. |
19
20
21
22
23
24
25

26
27
28


29
30
31
32
33
34
35
36
37
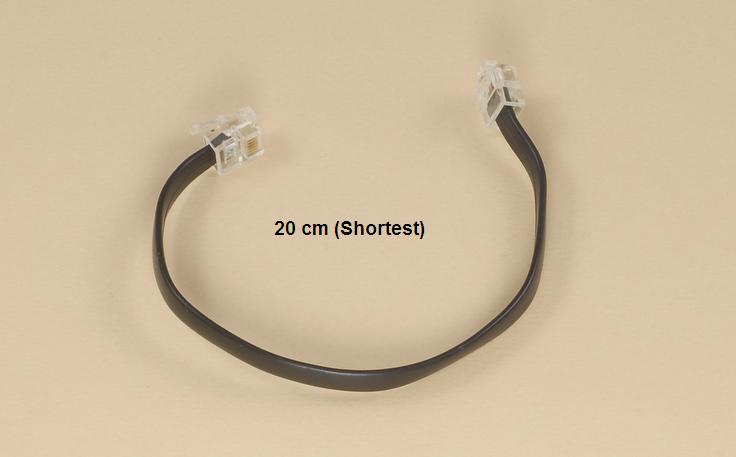
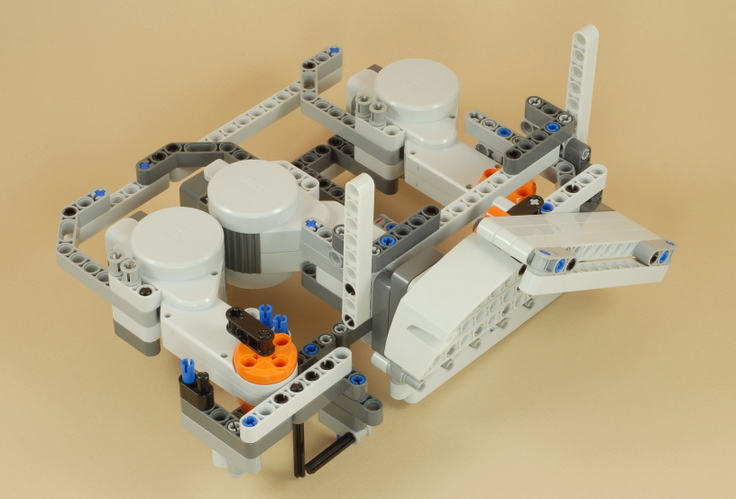
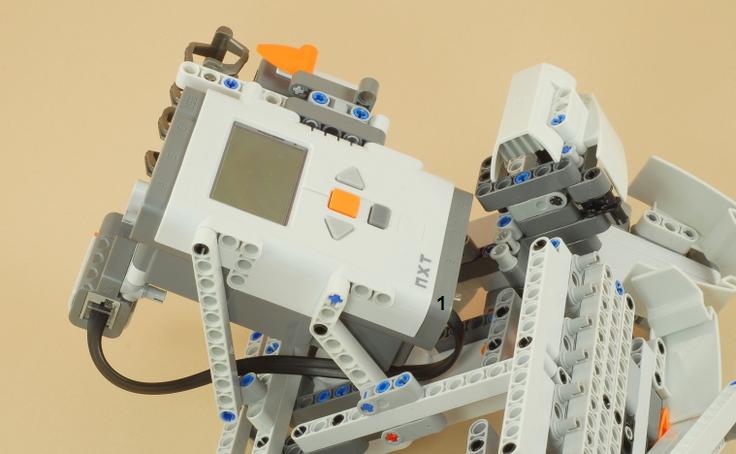
| Connect the touch sensor to port 1 on the NXT with a short wire. |
38
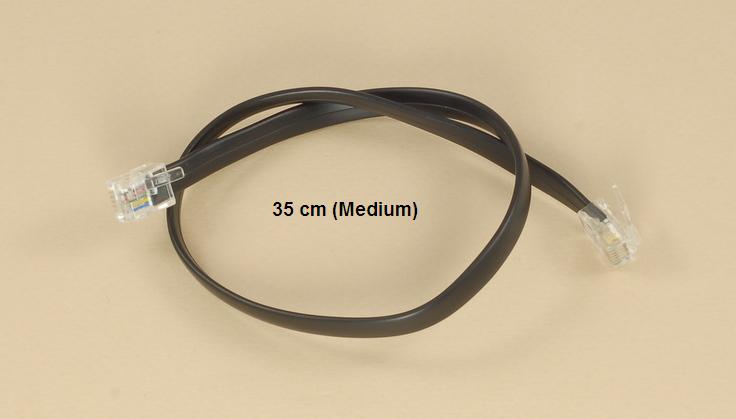
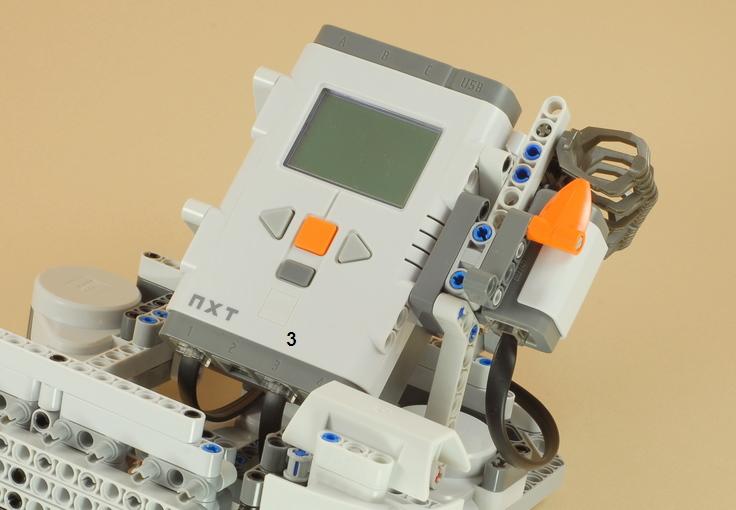
| Connect the color sensor to port 3 on the NXT with a medium length wire. |
39
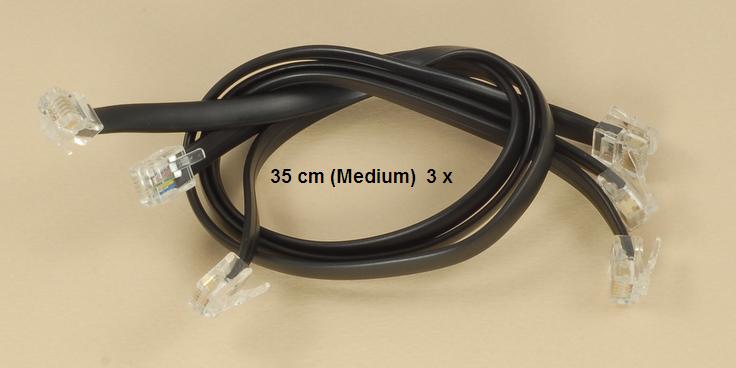
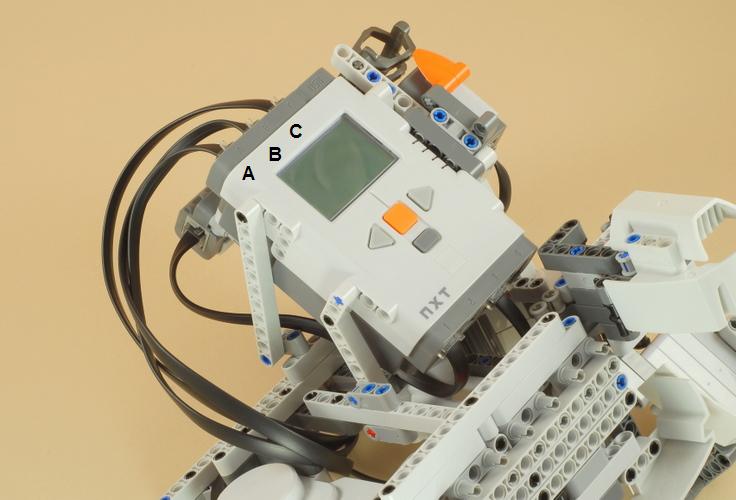
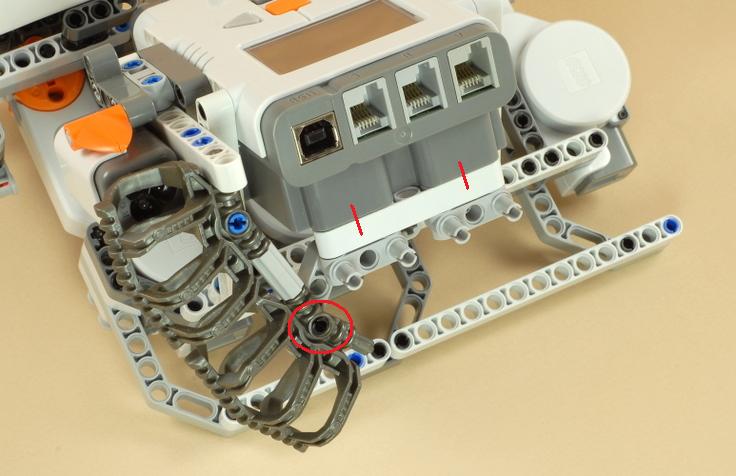
| Connect the medium wires to ports A, B, and C on the NXT, route them through the frame as shown above, then connect them to the three motors in the order shown below. |
40
41
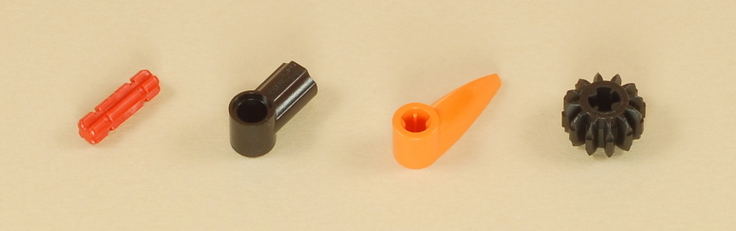
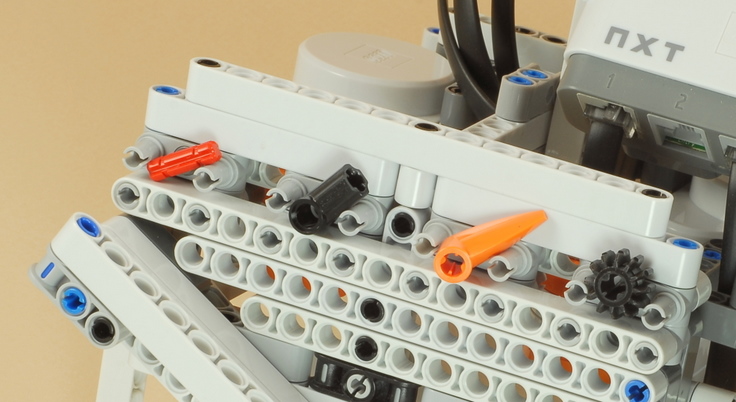
| The four parts for sale sit loosely on the rack on the front of the machine. |
42
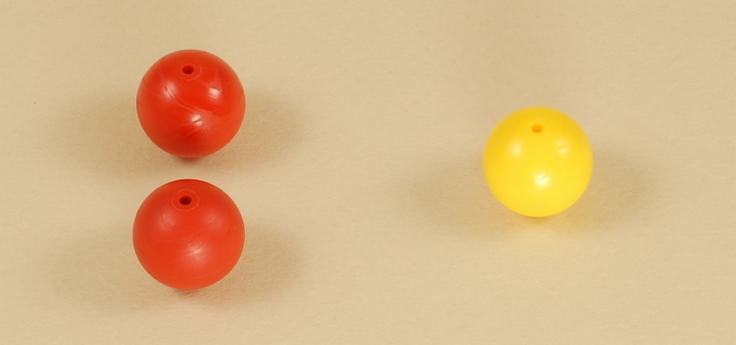
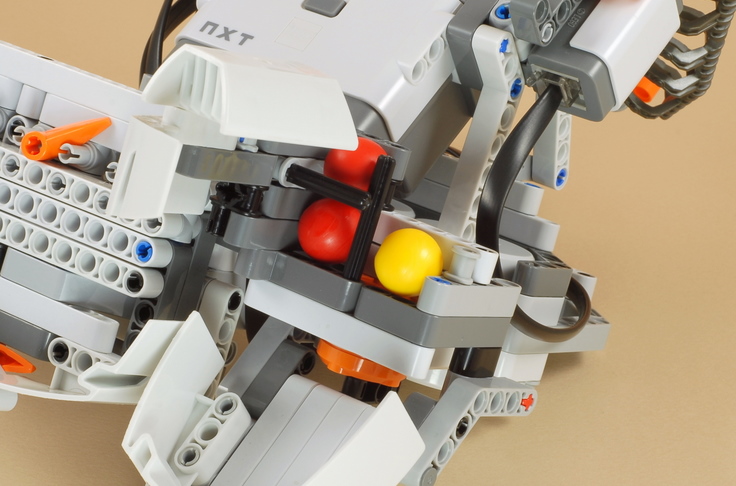
| Swing open the door to the change reservoir, and load two red balls ($0.10 each) on the left side, and one yellow ball ($0.05) on the right side. |
The other balls from your kit can be used as money to
pay for parts, with values as follows:
|
|
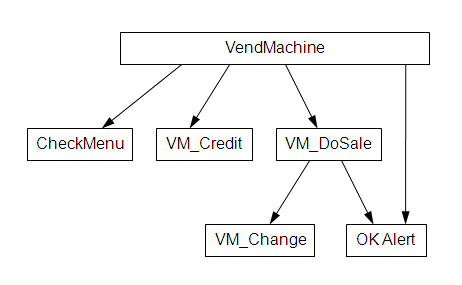
Vending Machine Programming The Vending Machine program is an example of a complex program that is split into several parts by using My Blocks. The "VendMachine.rbtx" file in the download above is a "Pack-and-Go" package that contains the main VendMachine program as well as the My Blocks and the graphic and sound files that are used by it. To use it, simply open the VendMachine.rbtx file in the NXT 2.0 software, and it will load all the required files automatically, then download the main VendMachine program to the NXT and run it. Instructions on how to use the vending machine are given below. Understanding the Vending Machine Program
The Vending Machine program uses the following My Blocks
to break down the program into smaller pieces. The three blocks
with "VM_" at the beginning of the name are specific to the Vending
Machine project, but the other two are general purpose utility blocks
that you could also re-use in other projects. To learn more about
how to use and create My Blocks, see the
My Blocks Tutorial.
To start understanding how the Vending Machine works, start by studying the main VendMachine program and reading the comments in it. This will give you an overall top-level view of how the program works. Then double-click each My Block to open its contents, where you can then learn more of the details of how they work. Note that some of the My Blocks are used by the VendMachine program directly, some are used by other My Blocks, and some are used more than once. The following diagram shows which My Blocks are used where.
|
| 1. First make sure that the four LEGO items for sale
and the three change balls are loaded into the machine, as shown in the
building instructions above, then run the VendMachine program on
the NXT. After each sale, you will need to
reload the items and refill the change reservoir.
2. Insert money balls into the chute marked by the large
orange arrow at the top right of the machine. You can enter any
amount of money, and the machine will attempt to make change. If
you insert not enough money, or too much money (not enough change in the
machine), the program will figure it out and display a message.
The value of the different colored balls is as follows:
|
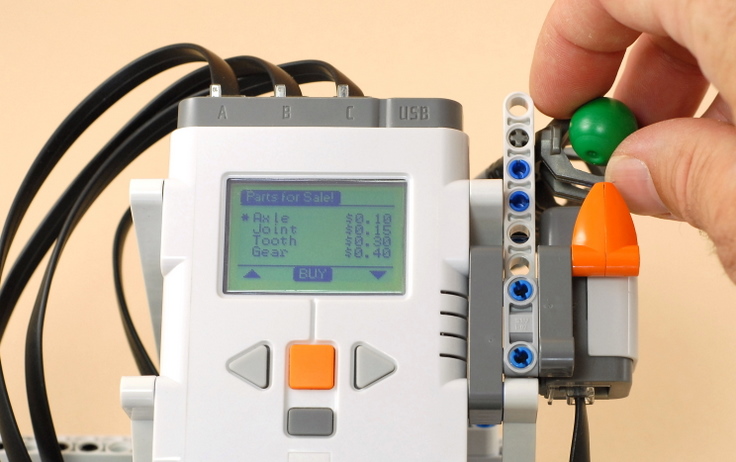
| 3. As money balls are inserted, the total amount of money inserted is displayed in the upper right corner of the display. Select the item you want to buy using the Left Arrow and Right Arrow buttons, then press Enter to buy it. |

| 3. The selected item is pushed off the rack and will end up the collection cup at the bottom center of the machine, and the change balls are dispensed into the change cup at the bottom right of the machine. |
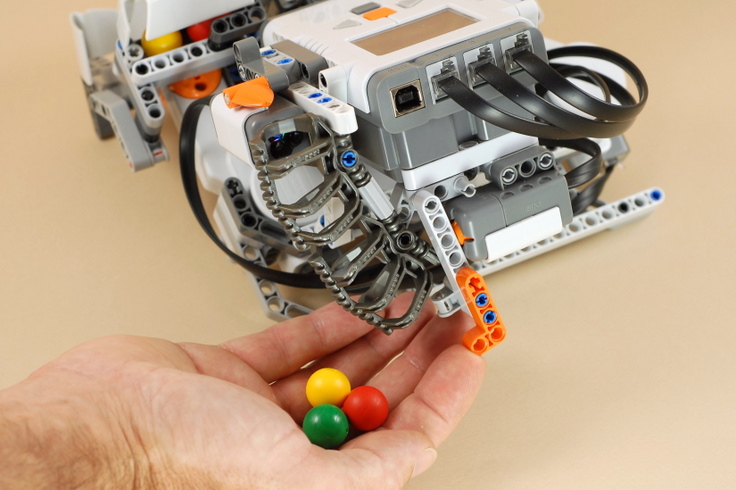
| 4. To collect the money balls inserted into the machine for re-use, or to cancel a sale after inserting money balls, hold your hand under the ball chute and push the orange coin return lever, and the balls should fall into your hand. |
|
Copyright
©
2007-2011 by Dave Parker. All rights reserved. |