Fun Projects for your LEGO® MINDSTORMS® NXT!
|
|
Fun Projects for your LEGO® MINDSTORMS® NXT! |
| NXT Segway with Rider |
|
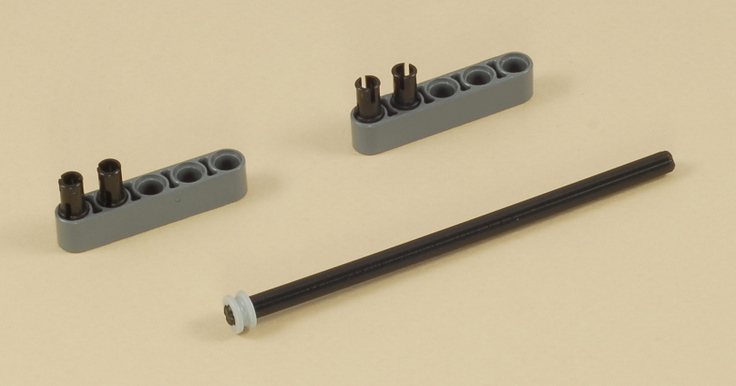
![]()
1
 |
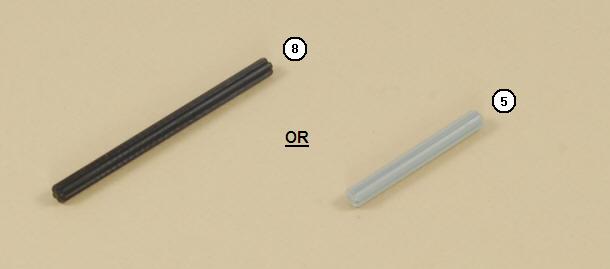
OR |
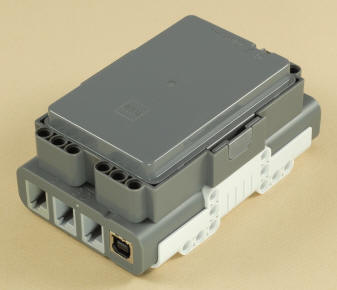 |
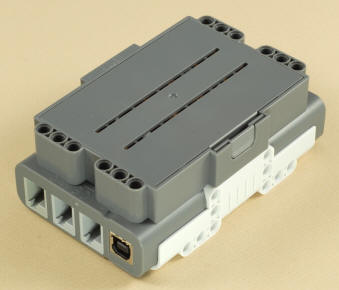
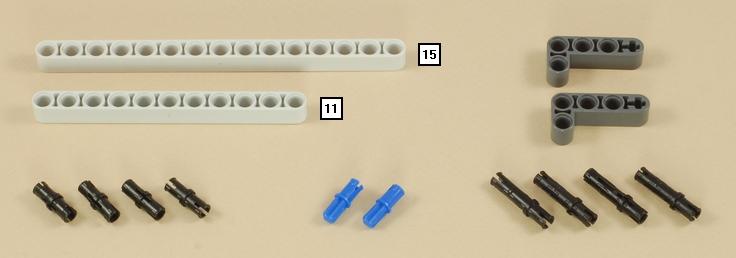
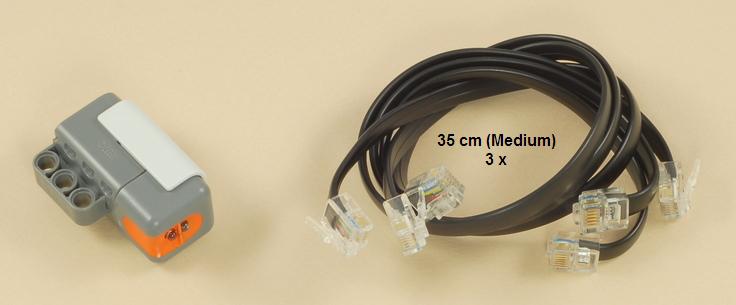
You can use the NXT with either AA batteries or the NXT Rechargeable Battery Pack. |
2
3
4
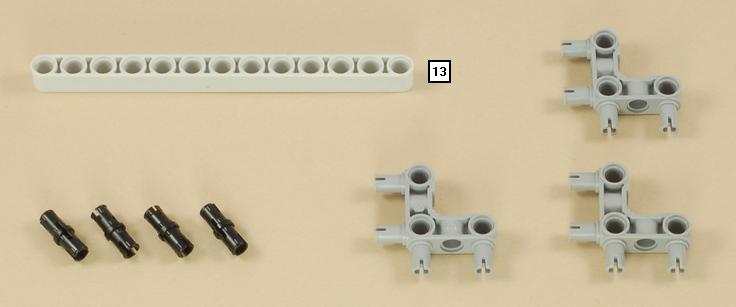
5
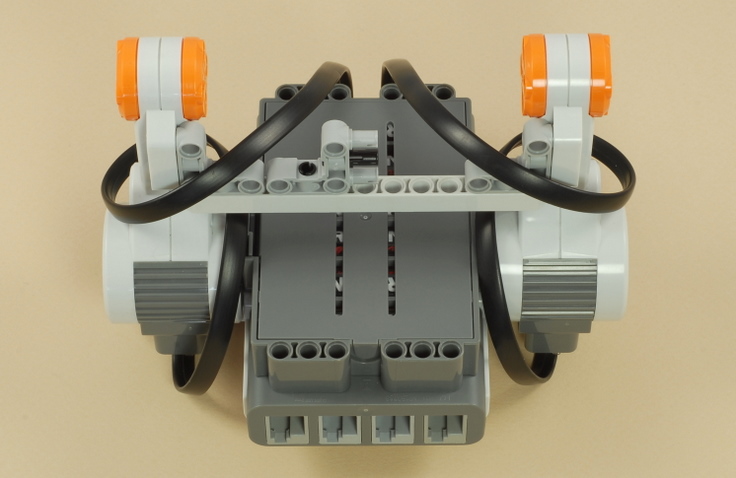
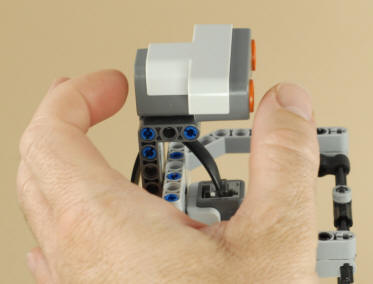
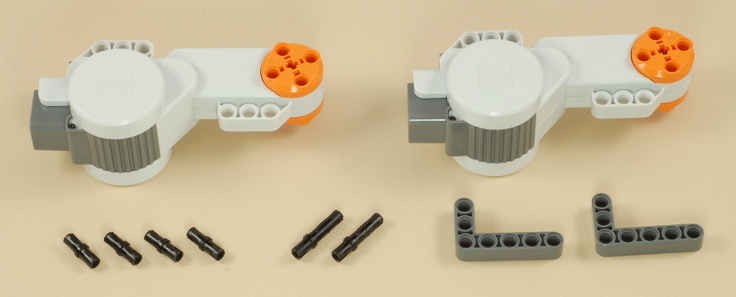
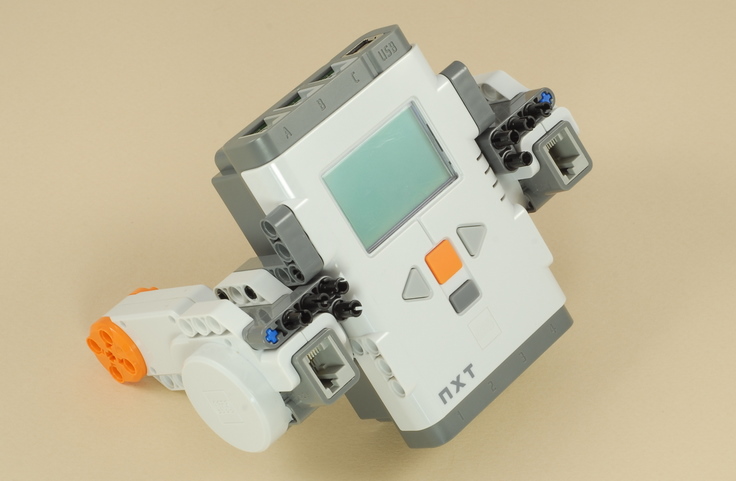
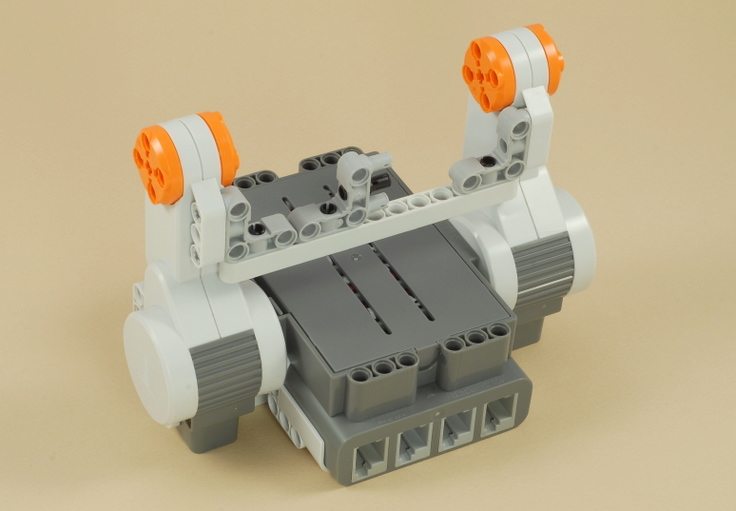
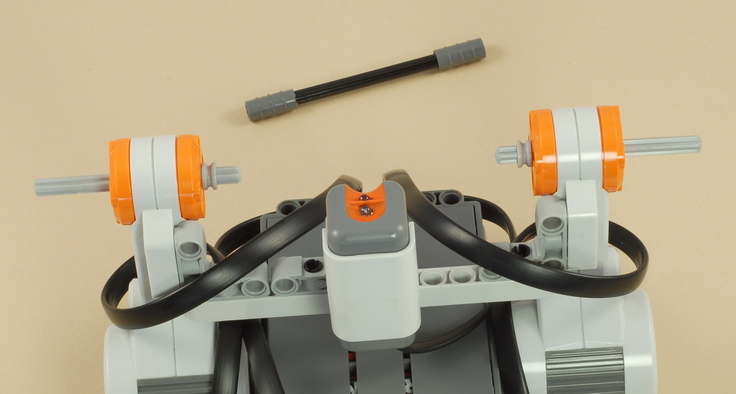
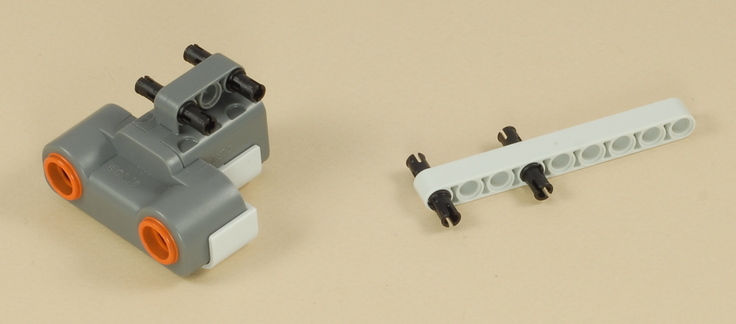
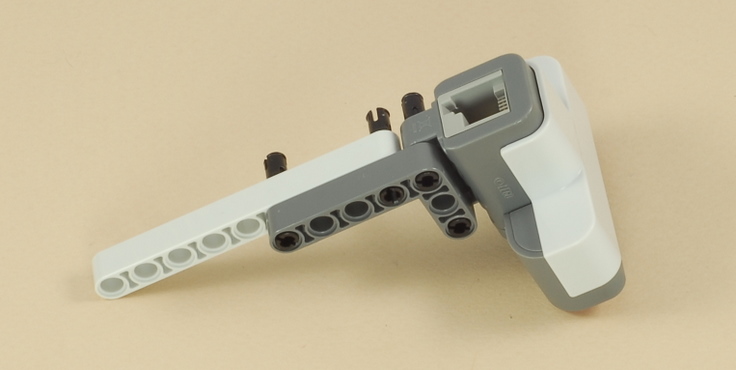
| Connect and wrap wires from ports B and C to the two motors as shown above, then connect and attach the light sensor to port 3 as shown below. |
6
7

8
9


10


11

12
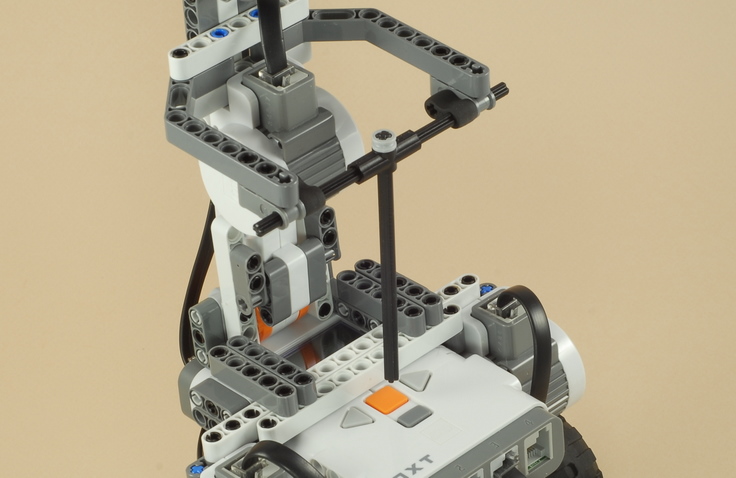
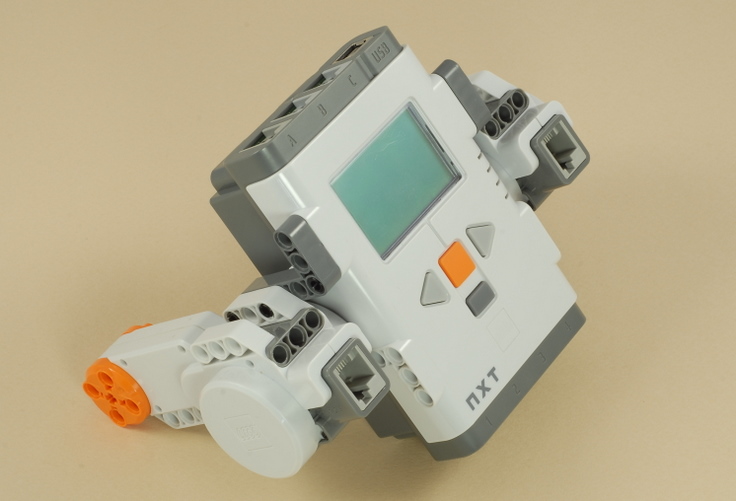
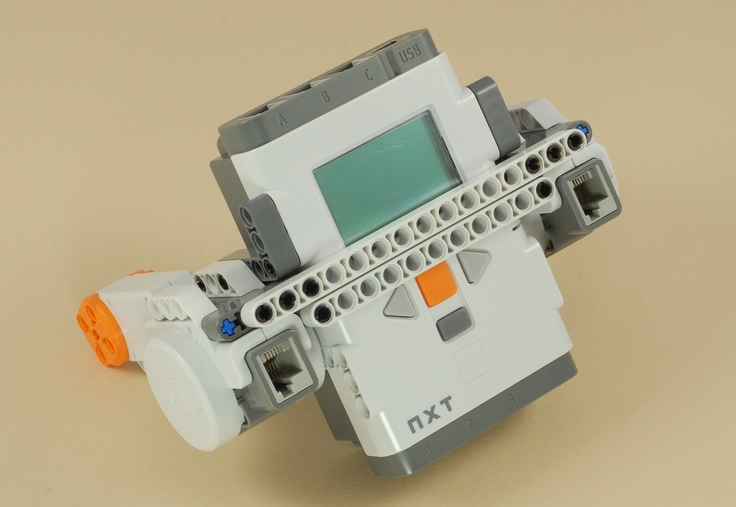
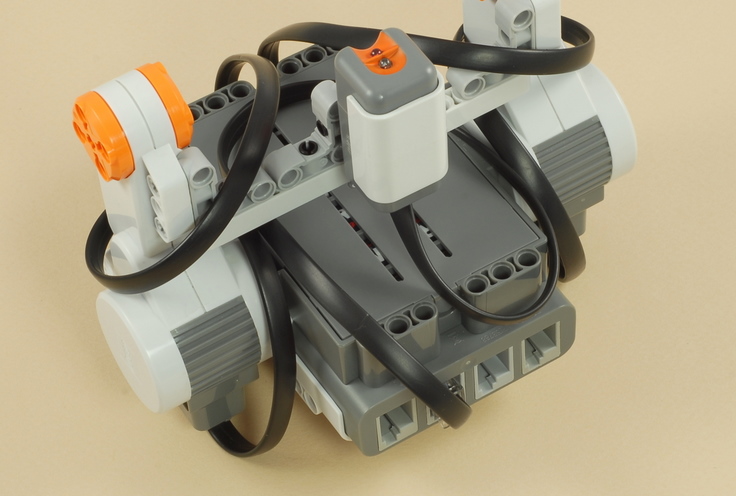
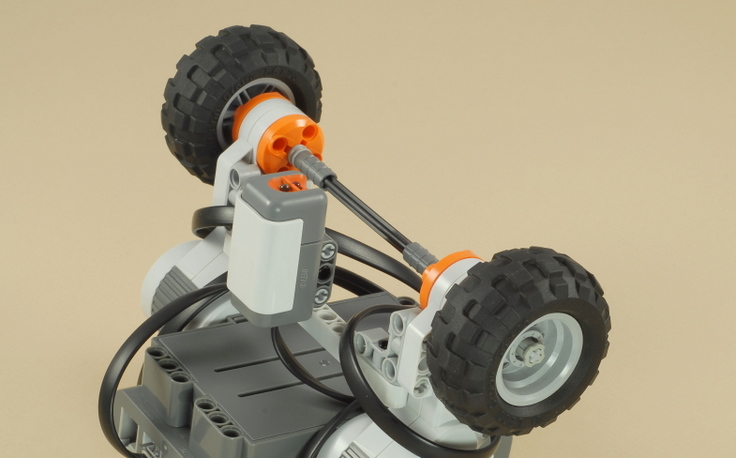
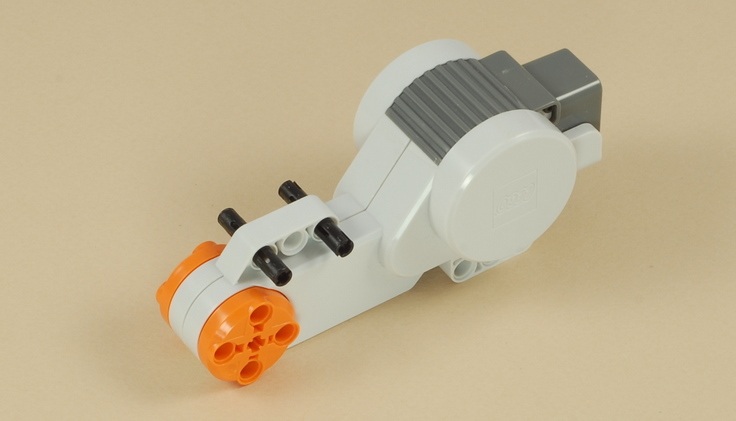
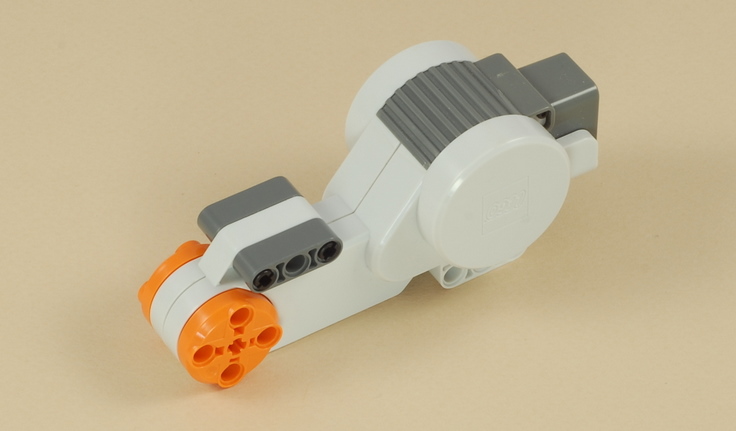
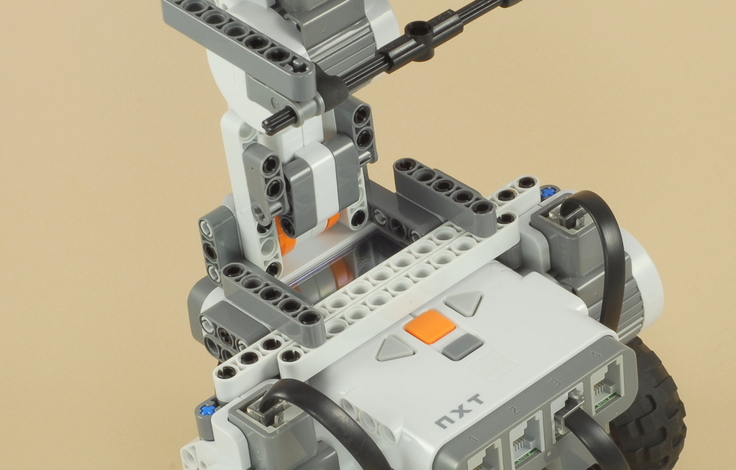
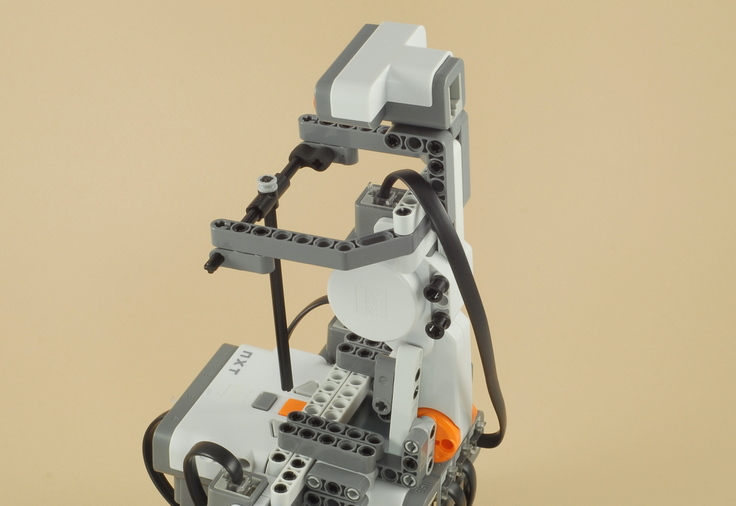
| Connect the body motor for the rider to port A. The ultrasonic sensor is not attached in this design. |
| NXT Segway
with Rider Programming Important Usage Information Note: Unlike balancing robots that use a gyroscopic sensor or other special sensors, this design uses only the light sensor, which does not know which way is "up" in an absolute sense, so it can only guess on its relative tilt based on the amount of reflected light received from the ground. As a result, getting a good balance is a bit of a challenge when you are using it. Please read the following important tips. Getting the NXT Segway with Rider robot to balance requires good lighting and surface conditions for the light sensor, and also requires that you start the robot exactly balanced to begin with, so be prepared to experiment with different surfaces and lighting, and also some practice at getting the robot started out balanced to begin with. Here are some tips:
The Programs Two programs are provided for the NXT Segway with Rider, Segway (or SegwayLS for LEGO Education 2.0) and SegwayBT (SegwayLS-BT for LEGO Education 2.0). Both of these programs balance the robot using a form of "PID Controller". See this Wikipedia article on PID Control for technical information on how a PID controller works. The Segway program will make the robot automatically balance itself, based on its initial position, without any leaning movement by the rider. When using this program, you can lock the rider in place to keep him upright as explained below. The SegwayBT program adds Bluetooth remote control to allow you to control the forward and backward lean of the rider from another NXT brick via Bluetooth. First, establish a Bluetooth connection from the second NXT (the remote control) to the Segway NXT on Connection 1, then run the SegwayRemote program on the remote control NXT and the SegwayBT program on the Segway NXT, starting with the Segway balanced. Now pressing the gray Left and Right arrow buttons on the remote control NXT will cause the rider to lean slightly in that direction. Use only slight movements (e.g. one or two presses in each direction), so that the Segway can keep up with the motion. |
Challenges
|
|
"Segway" is a registered
trademark of Segway, Inc. |
|
|