nxtprograms.com

Fun Projects for your LEGO® MINDSTORMS® NXT!

Home     Projects     Help     Contacts

Car with Game Controller
Building: Expert
Program: Expert

Building Instructions


1-11

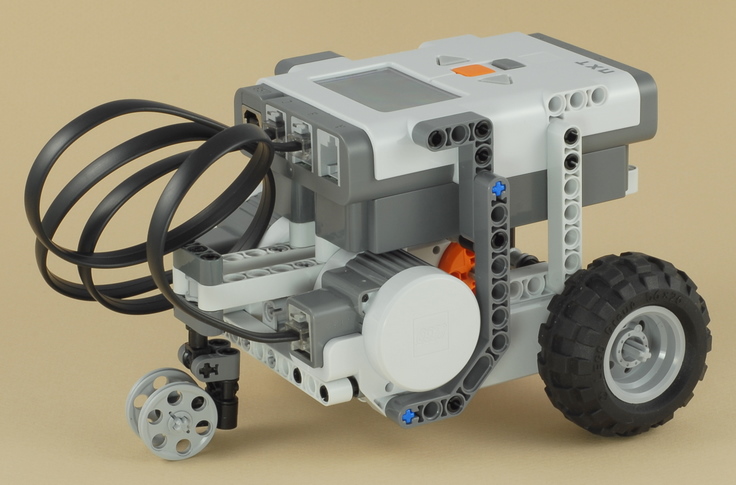
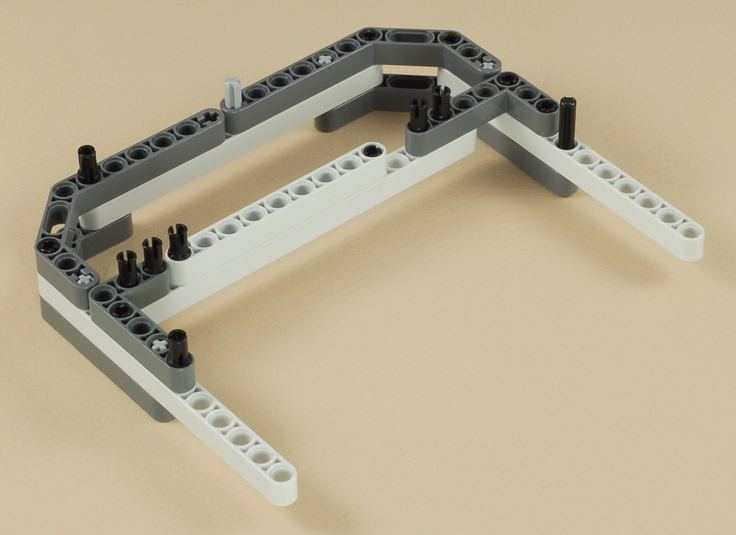
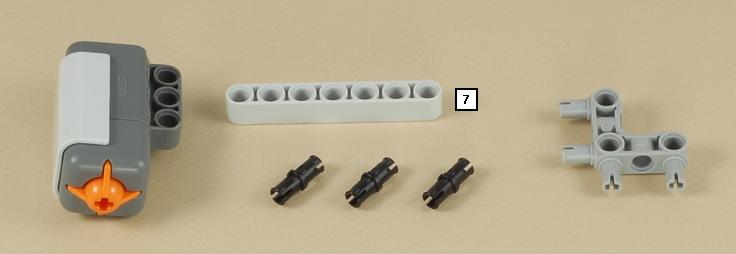
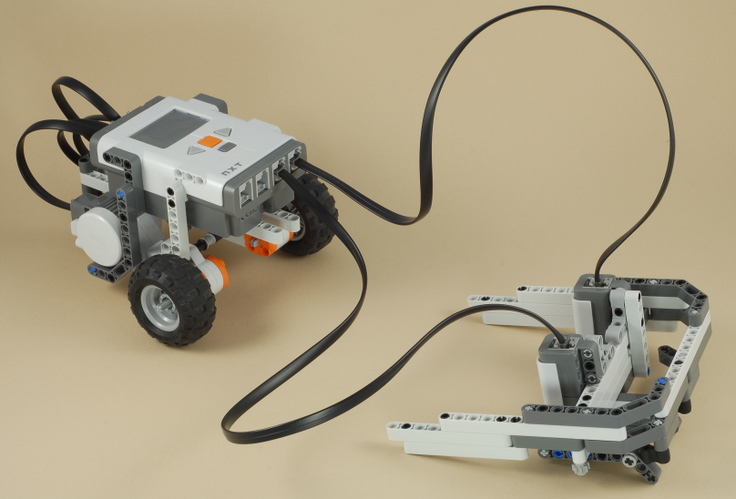
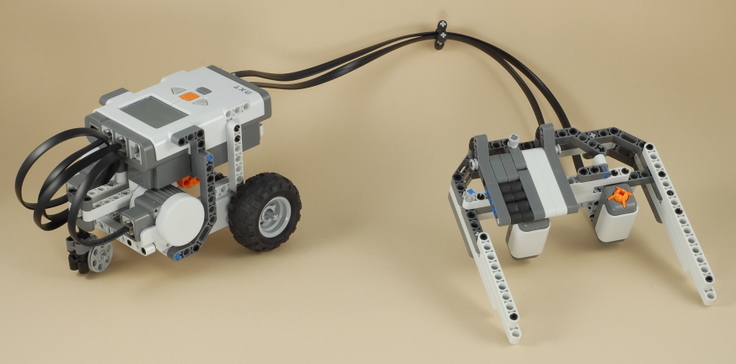
Start by building the Castor Bot.  Click the picture for building instructions.

The "Game Controller" built by the remaining steps in this project can also be used to control other robots that you design yourself.  See the Challenges section at the end of the building instructions for details.
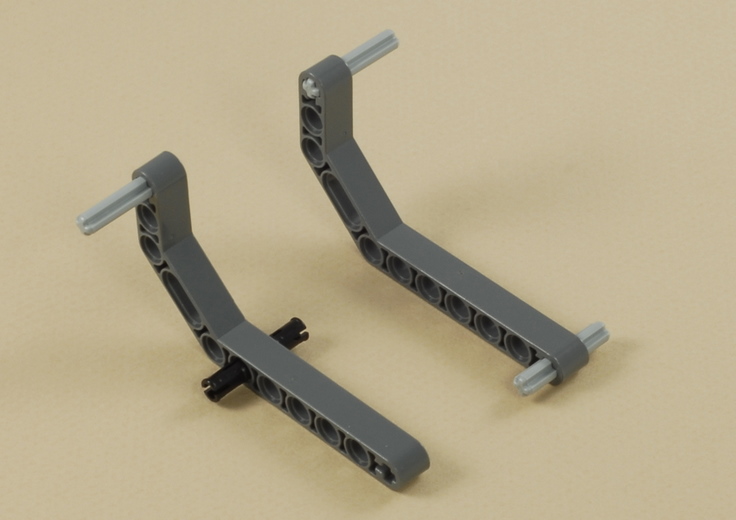
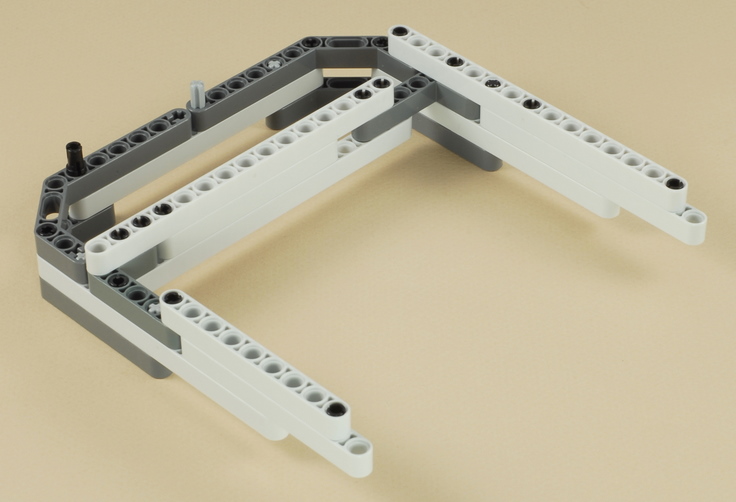
Building Instructions


12

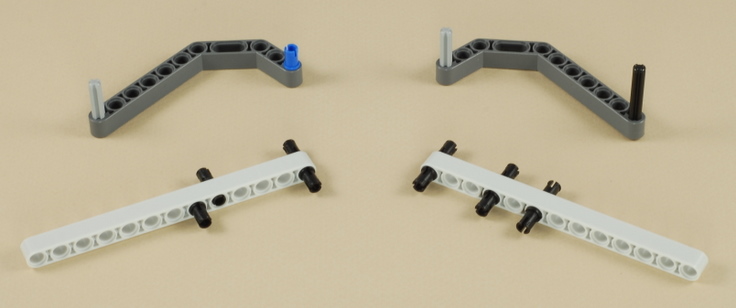
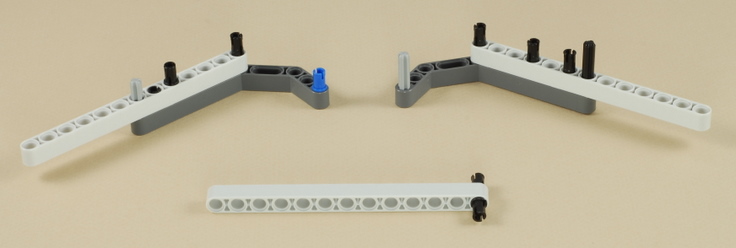
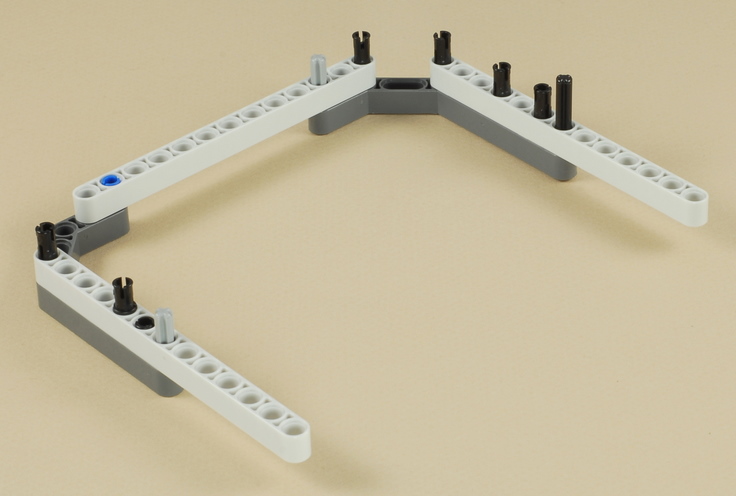
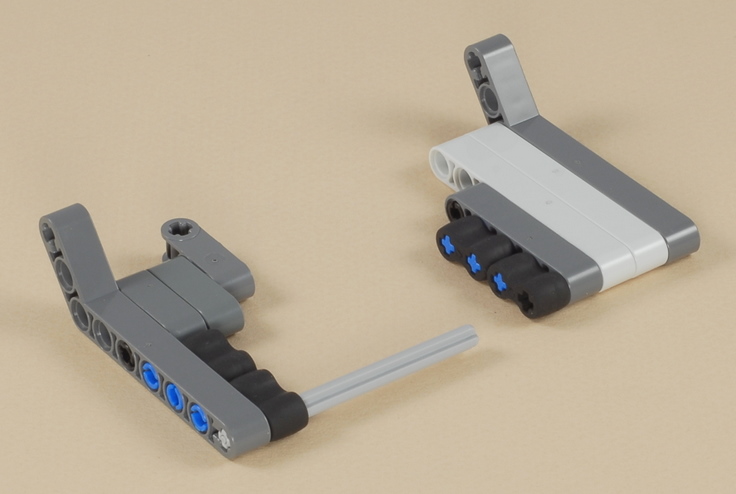
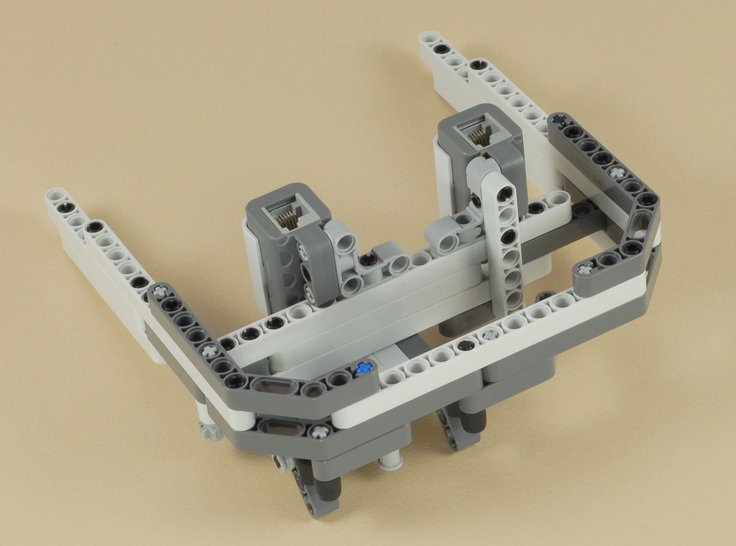
Note: The construction of the controller is not symmetrical.  The left side is different from the right side.  Look at the pictures in each step carefully.


13


14


15


16


17

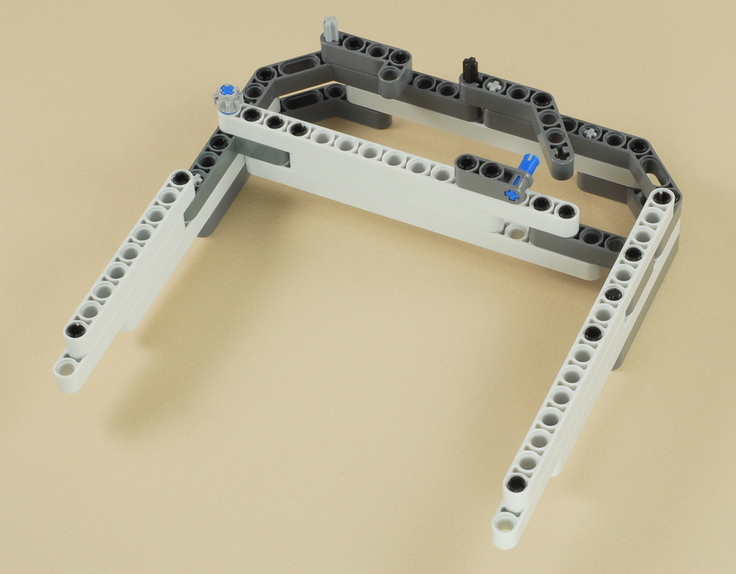
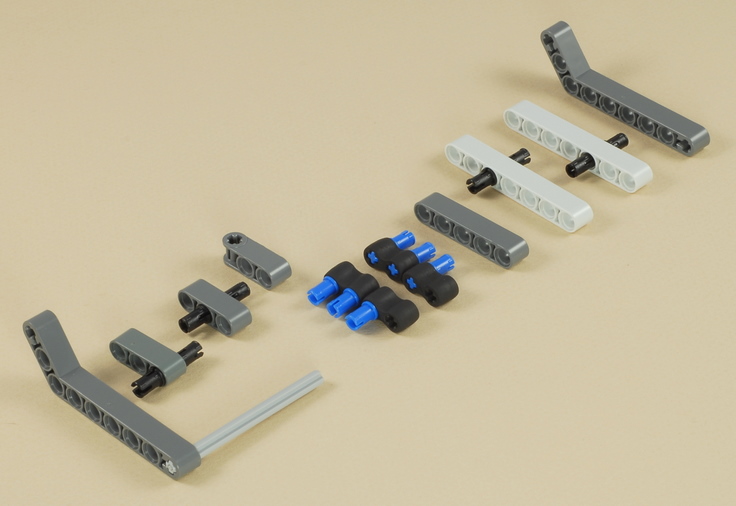
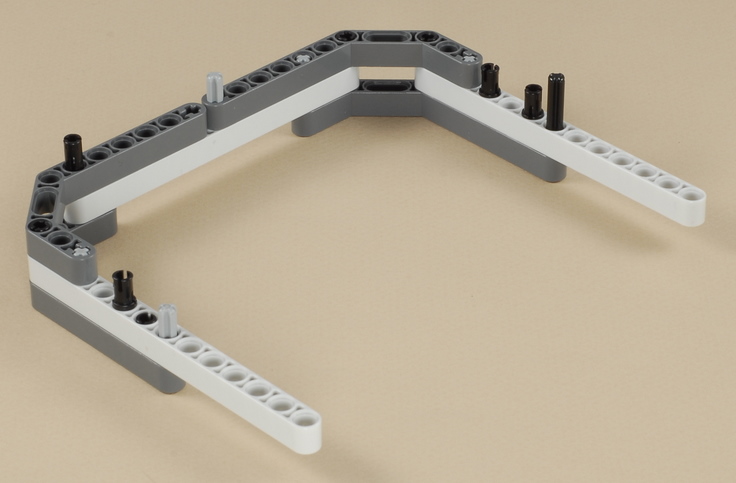
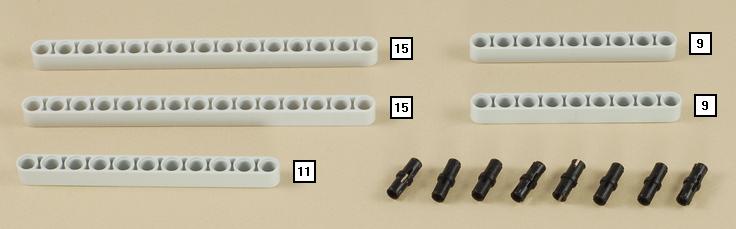
Note: The white beams used in this step need to be white in order for the light sensor to work correctly.  If you don't have any white beams of this size (because you are using the Education version of the NXT set), then you can tape a small piece of white paper over the bottom of these parts so that the light sensor will see white on the bottom of these beams (see How the Controller Works).


18


19

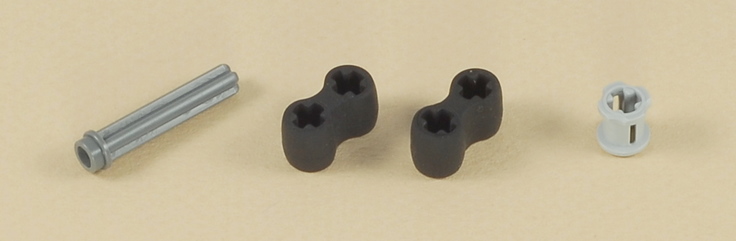
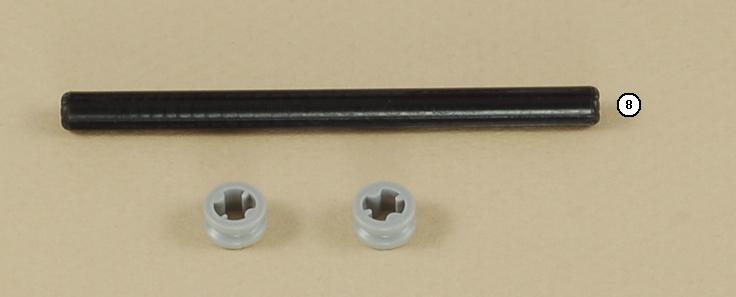
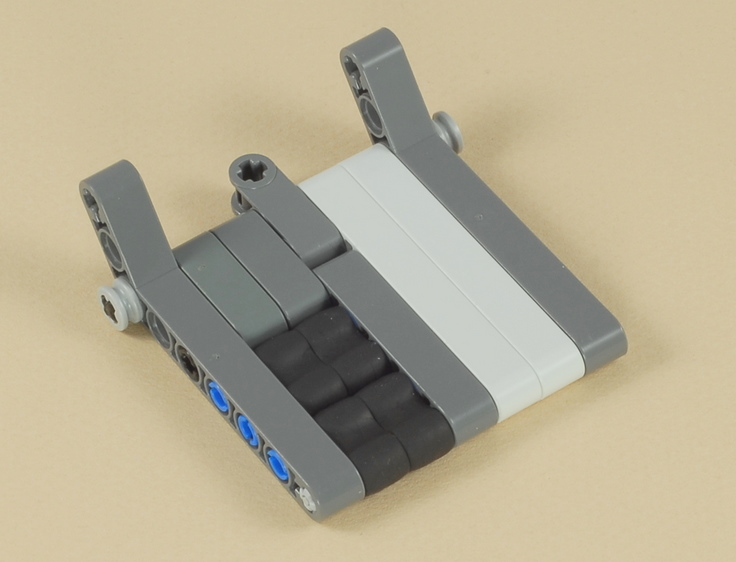
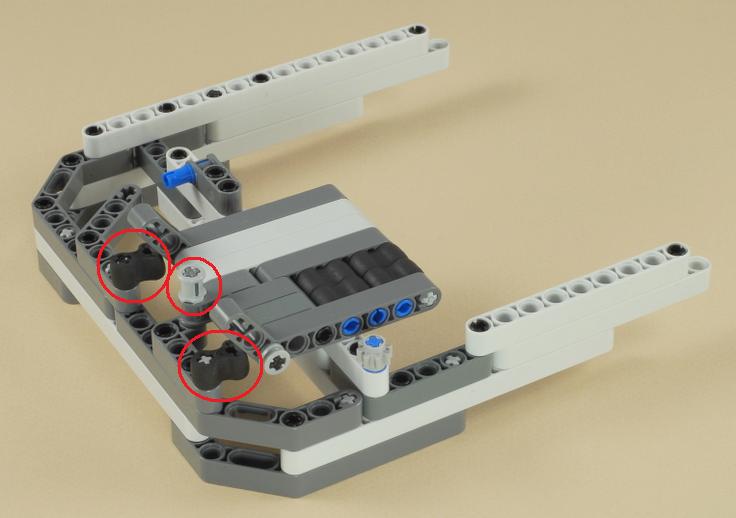
Turn the controller upside-down then insert the axle as shown below.

For this part of the step:

  1. Hold the axle in with one finger to keep it from falling out.

  2. Turn the controller back right-side up

  3. Insert the thumb control plate over the axle (angled beams pointing up), and secure it with the bushing as shown below.

  4. Push the thumb plate back and forth to make space to put the two rubber pieces on each side as shown below.  

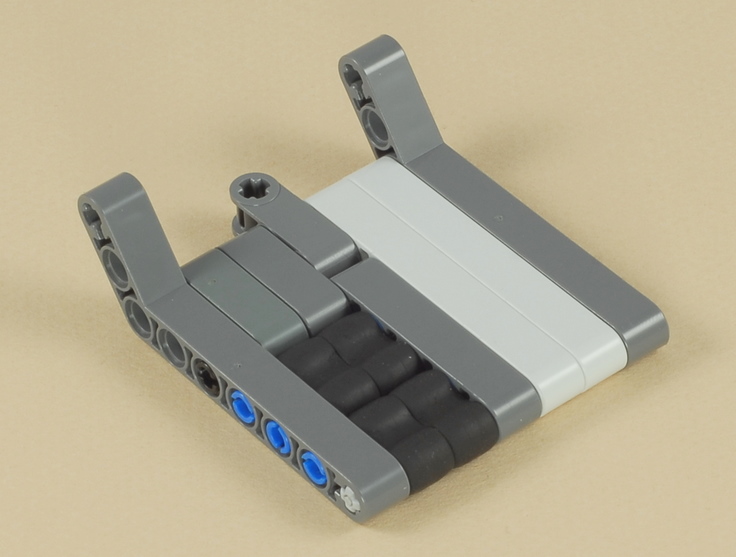
The rubber pieces are used to push the thumb control back to the center position when you let go.  If you think that this makes the thumb control too hard to push, you can remove them and keep the control centered manually with your thumb when necessary.


20

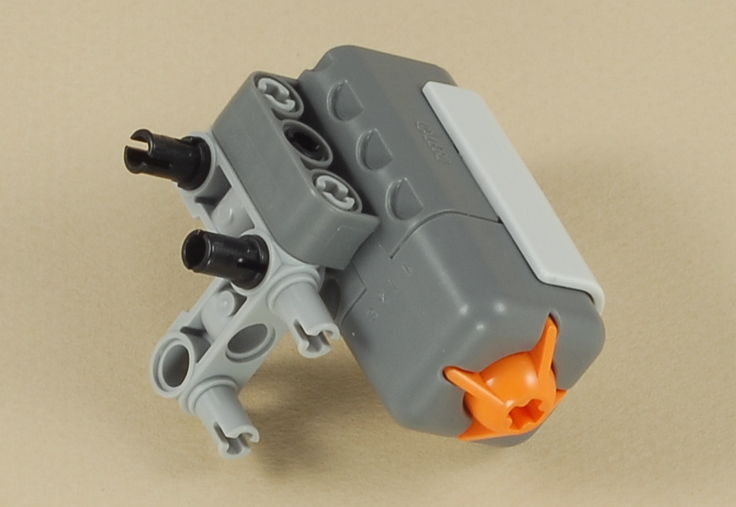
Turn the controller upside-down to install the touch sensor as shown below.


21

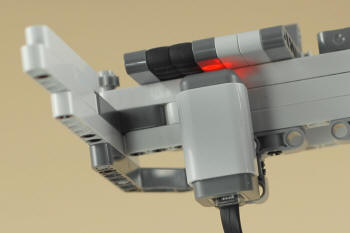
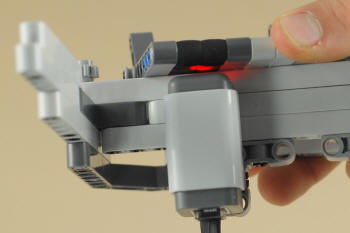
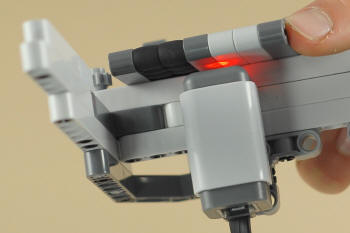
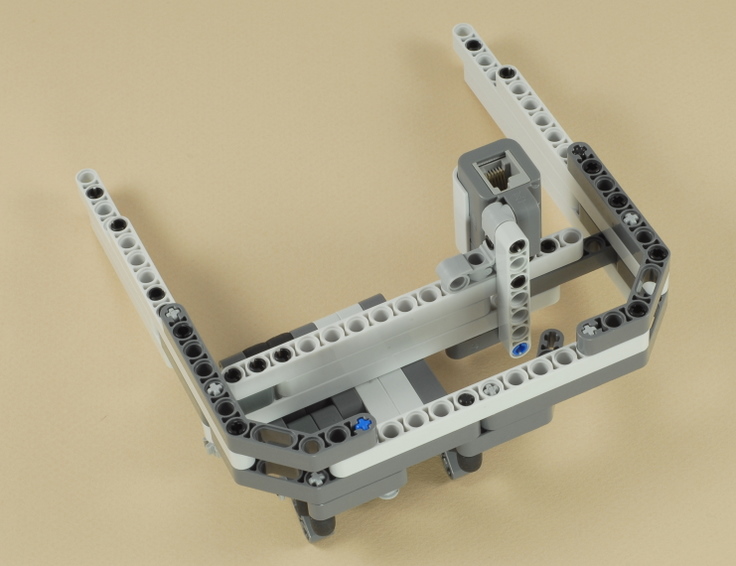
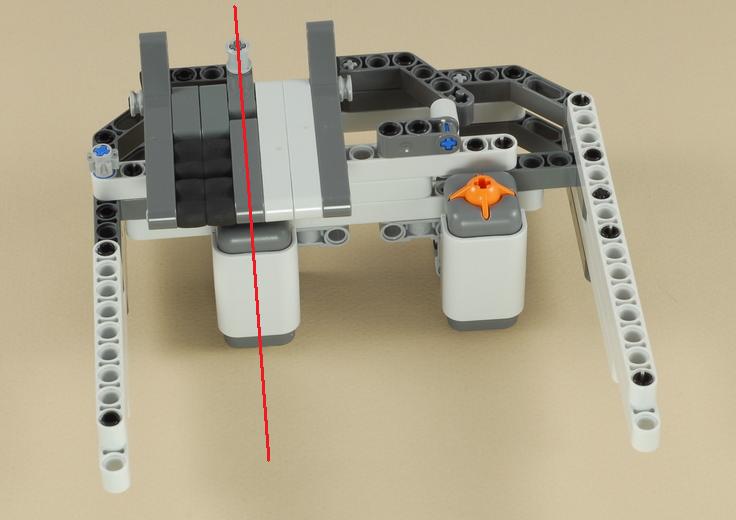
Make sure that the light sensor is centered over the gray beam in the center of the thumb plate when the thumb control is centered, as shown below.


22

Use the two longest wires to connect the light sensor to port 3 and the touch sensor to port 4 on the NXT.


23

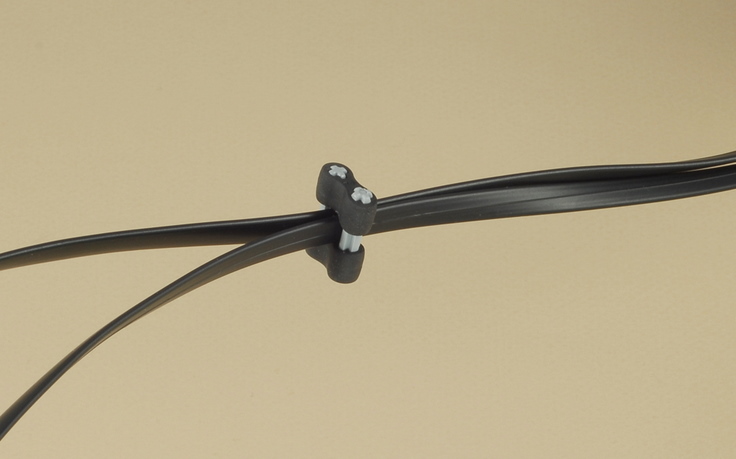
This wire clip will help keep the two wires organized and reduce tangling.


Car with Game Controller Programming

Use the program Game Control for the Car with Game Controller.  This program could also be used along with the controller built in this project to control other robots that you create.  See the Challenges section below for details.

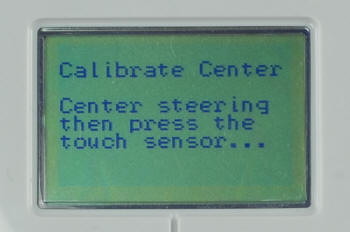
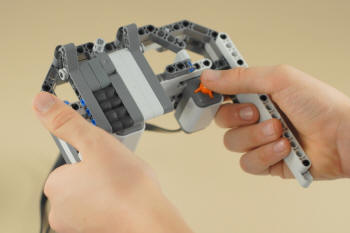
Using the Game Controller

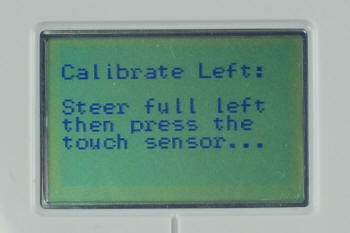
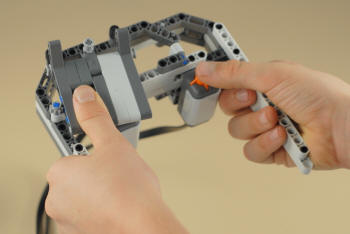
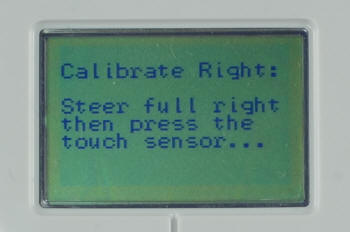
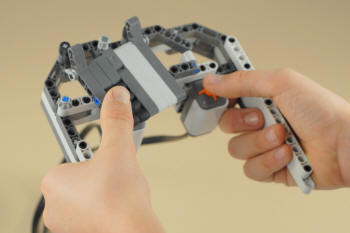
The light sensor on the game controller must be calibrated before it will work right.  At the beginning of the program you are asked to steer the left thumb plate all the way to the 
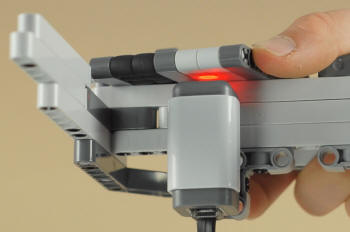
left, then all the way to the right, then put it in the center, pressing the touch sensor button after each step. This allows the light sensor to see what the different colors look like so that it knows what range of light to expect.  These steps are pictured below.
 

Once you have completed the three calibration steps, you are ready to drive.  Driving works as follows:

  • When the touch sensor button is pressed and held down, the robot will drive forward and the left thumb plate will steer the robot left and right while it is driving.  The more you move the thumb plate, the sharper turn the robot will make.

  • When the touch sensor is not pressed, the thumb plate will pivot the robot left and right in place.  The more you move the thumb plate, the faster the pivot movement will be.

While driving, the NXT display will draw a center line and a moving circle to indicate the position of the thumb plate, and display the word "Pressed" whenever the touch sensor button is held down.


How the Controller Works

The left thumb plate of the game controller works by making the light sensor see different shades of gray when the plate moves back and forth.  The program reads the light sensor value and uses that number to determine how much to pivot or steer, and in which direction.
 

When the left thumb plate is centered,
the sensor sees the gray beam.

When the thumb plate is all the way to the left,
the sensor sees the white beams.

When the thumb plate is all the way to the right,
the sensor sees the black rubber pieces.

When the thumb plate is moved slightly to either side, the sensor sees a mixture of two colors, which will give intermediate values between the ends.


Challenges
  • The Game Control program is long and complex and contains a lot of Math blocks to calculate various numbers that are needed to make the light sensor work as an "analog" steering control.  If you are getting good at NXT programming, try looking at this program and reading the comments to see if you can understand how any parts of it work.  Don't worry if you don't understand how the calculations with the Math blocks work, just take a look at the other parts.

  • The Game Control program along with the controller built in this project can be used to control other two-motor driving robots that you design and create yourself.  Try building another robot to control with it.  Here is what you will need to do:

  1. Your robot should have two motors used to power it, with the motor connected to port B on the left side of the robot and the motor connected to port C on the right side.

  2. As in building step 22 above, connect the wire that leads to the light sensor of the game controller to port 3 on the NXT and the wire leading to the touch sensor to port 4.

  3. Use the Game Control program and try it out.  If your robot goes backwards instead of forwards when the touch sensor is pressed, here are four different ways to fix it (choose only one):

    1. Turn the NXT brick around on your robot so that the whole robot faces the other way (this is probably the easiest fix), or

    2. Rebuild your robot so that the motors are upside-down from the way they were, or

    3. Rebuild your robot so that the motors are turned around front-to-back from the way they were, or

    4. Modify the Game Control program to change the Move blocks to go the other direction.  As written, the Move blocks use "backwards" for the direction, so you will need to change them to "forwards".  Find the six green Move blocks in the program. One of them is just a Stop, so you will need to change the direction on the other five blocks.

  • The controller and the Game Control program could also be used to control other kinds of robots (other than two-motor drive robots) or machines that you design yourself.  If you understand enough of the program to modify it, you could change it to control something else.  The key things to find in the program are the six green Move blocks.  These six blocks correspond to the following six cases from the controller:

    1. Steering right with the touch sensor pressed

    2. Steering right without the touch sensor pressed

    3. Steering left with the touch sensor pressed

    4. Steering left without the touch sensor pressed

    5. Steering centered with the touch sensor pressed

    6. Steering centered without the touch sensor pressed

    These six cases could be modified to do something else.  In each case, you know whether the touch sensor button is being pressed or not, and you have a value in the variable named "Control" which indicates how far the left thumb plate is being pushed to the side.

Get nxtprograms.com on CD!
Click here for info

Home     Projects     Help     Contacts


Copyright © 2007-2011 by Dave Parker.  All rights reserved. 
All project designs, images, and programs are protected by copyright.  Please see the usage policy.